
Easy Sound in Premiere, Final Cut, or DaVinci using Accentize's DialogueEnhance2
· Audio · Post-production & software · 14:06
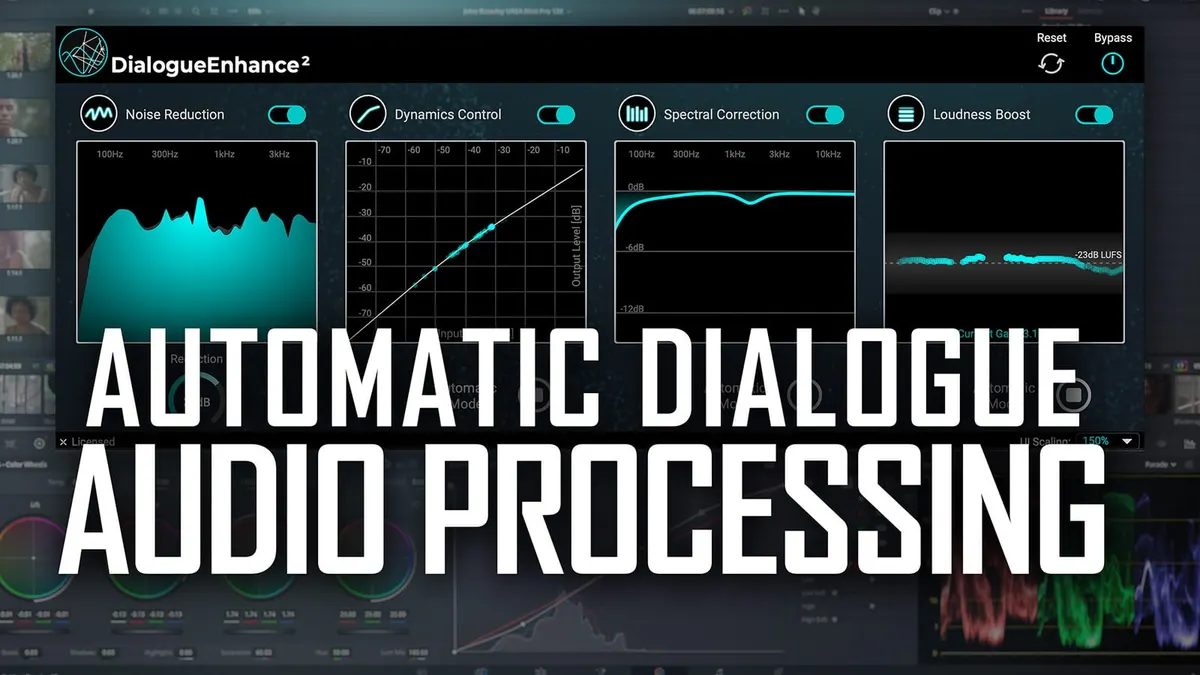
In this week’s episode we have a look at Accentize’s DialogueEnhance 2 plugin. This multipurpose plugin can run in non-linear video editors — Premiere Pro, Final Cut, and Davinci Resolve — as well as digital audio workstations and includes everything you need to clean up audio for your videos, podcasts, and other dialogue-based projects. In this video, we walk through the DialogueEnhance feature set and explain how you might go about using each module to best clean up your dialogue sound. Let’s take a closer look!
Gear used or mentioned
The links below are Amazon, B&H Photo, Sweetwater, or other affiliate links. As an affiliate, I earn from qualifying purchases.
- Accentize DialogueEnhance 2 Plugin
- Sound Devices MixPre audio recorder — B&H, Trew Audio, Sweetwater, DVE Store, Amazon
- Rycote PCS Microphone Quick-Release System — B&H
- Aputure LS 300X used for background light — Aputure, B&H, Amazon
- Aputure Spotlight Mount — Aputure, B&H, DVE Store. Amazon
- Rosco Gobo creates the pattern on the back wall — B&H
- Canon C70 cinema camera — B&H
- Canon RF 24-70 f/2.8L lens — B&H, Amazon
- Schneider Radiant Soft 1 diffusion filter — B&H
- Panasonic GH5 camera — B&H, Amazon
- Panasonic 12-35mm f/2.8 II lens — B&H, Amazon
Read the transcript
[Music]
I often get questions like, How can I simply process my audio for, say, example, YouTube videos or a video that’s an interview, and do that within my non-linear editor, within my video editing app? Well, here’s one way to do that, especially for those that, you know, don’t necessarily want to kind of dive into the world of audio processing and become a mix engineer or anything like that, here’s a pretty simple way to do it. I do recommend you learn these fundamentals at some point and learn how to do this on your own, but for those that are in a hurry, here’s an example. We’re going to be using a plug-in called DialogueEnhance2 from a company called Accentize; in this case
I’m going to demonstrate this in DaVinci Resolve– this is in version 18. It also works in Final Cut
Pro, it also works in Premiere, so you can use it in any of those and of course for those amongst us that do work in digital audio workstations, it does work in most digital audio workstations as well. You have an AU version on Mac as well as a VST version and this is an example of how that works. So I can go ahead and drag this to this particular clip, or in this case I can go ahead and drag it to this track, so we’ll just go ahead and drop it in here as an effect on this track and we’re just going to be using this top track here tonight so let’s go ahead and take a listen. I’m going to go ahead and get back to the start; let me play, I’m going to go ahead and take this plug in here and we’re going to go ahead and turn everything off. And we’re going to bring them on one at a time as we walk through this but let me just play for you where we’re starting. [Playback] [Playback]
Okay– a few problems, the fan is very prominent, overall the levels are too low; let’s go ahead and take care of some of those things and see what we get here. So first thing I’m going to do is turn on the noise reduction– so we have four modules, we have noise reduction, dynamics control (think compressor), we also have spectral correction (think equalizer), and we also have a loudness boost and for each of those you can turn them on or off individually, but you also have whatever controls are associated with that particular module down below. So for noise reduction you have one control and that is how much reduction do you want to do. It’s going to identify the noise and this is once it’s figured out what’s noise and what’s not noise, what’s dialogue, this is how much it’s going to reduce that noise. That’s what this setting does. So let’s go ahead and play through and see where we end up here. [Playback] [Playback] [Playback]
Okay, let’s start there; we can always come back and tune that. Next up let’s get our dynamics control going and what I’m going to do here is it’s actually pretty hard to hear this because it is these overall levels are pretty quiet;
I’m going to go ahead and turn on the loudness boost at the end here and let’s go ahead and we’re going to put it in automatic mode for now, and we’re going to tell it to target, let’s say, -23. That should be closer to my voice so let’s hear let’s go ahead and take another shot at the noise reduction here now that we’ve turned that loudness boost on. [Playback] [Playback] [Playback] [Playback]
Okay; so what I’ve noticed here is the reduction– if you dial down to a smaller number it’s not going to remove as much of the noise; if you dial up to a bigger number, the risk is you can start introducing artifacts; it can start to sound like the dialogue itself is being very processed, it starts to maybe take a little bit of a robotic sound, a little bit of a harsh sound so let’s kind of dial that in a little bit more. [Playback]
Also, incidentally, for these controls, if uh have a control like this, I just click in the middle and I pull down on my mouse to reduce the value or push up on my mouse to increase the value. [Playback] [Playback]
I think we’ll go probably about right there. Let’s go on to dynamics control; again, this is kind of like a compressor and the idea here is that it will even things out. So you can see we have a higher amplitude bit here where I talk louder for just a moment, a little bit louder here, and then quieter over here. This will help to kind of pull some of these levels down here so that the loudness boost has room to push the overall levels up. Let’s go ahead and play through this with it in automatic mode and then I’ll pop it out of automatic mode and play with some of the controls and show you those as well. When we get out of automatic mode, we actually have a control here for ratio; this is how much compression it does, in essence, so once, for example, that the compressor or the dynamics control gets to this part, the higher the ratio I use, the more it’s going to kind of squash this down to get it in line with everything else. What we can do in automatic mode is it’s actually dynamic; it will actually take care of that curve for us. Let’s go ahead and try it. [Playback] [Playback] [Playback] [Playback] [Playback]
Now you can see it’s actually dynamically changing that as the dialogue goes on so it might be compressing a little bit more, a little bit less depending on what is needed here. Pretty nice, and it actually… is it perfect? No; is it fairly transparent? It’s fairly transparent, you can hear this being compressed but it’s it’s um you know again, if you need something simple, this is a pretty good option for that. Let me go ahead and go back here, let’s play it again, and let me take it out of automatic mode and show you what happens when we really crank up the ratio. [Playback] [Playback] [Playback]
You could tell there that we’re getting a pretty extreme there. You also do have the option to change this, which is the threshold setting; let me go ahead and show you what that does when you’ll hear it it’ll start to sound really kind of pumpy and um really kind of squashed. [Playback] [Playback] [Playback] [Playback] [Playback] [Playback]
Okay, so you can see what happens there, so like you can you have these two controls basically, again, the threshold and the ratio; if we crank the ratio up and pull the threshold down, it sounded really squashed and it actually got quieter because it is getting quieter, but you want to kind of fine tune that so it doesn’t sound obvious that it’s being compressed but it is managing some of these transients– the things sticking up a fair bit more in the waveform. Again,
I think the automatic mode does pretty well if you didn’t understand what any of that means and you want something simple, go to automatic mode; if you do want to tweak it a little bit you can pop it out of automatic mode, you can change the threshold and the ratio. I would generally, for dialogue, keep it around 2.5 and then just to adjust this threshold here so that it is so that the peaking comes up to about, you know, right around this symbol here, the threshold symbol, and just barely kind of surpasses that a little bit and gets compressed. Otherwise if you if you start cranking it down and it’s hitting up and it’s going up above this all the time, it’s doing a much heavier compression so you just want to tickle the compressor. You want to tickle this area right here and just barely pass that periodically. Let’s go ahead and pop it back into automatic mode and let’s move on to spectral correction. Spectral correction is like an equalizer. What does that mean? Well, what this does is it takes first of all any low frequency stuff below your voice, or the recorded voice, and it removes some of that so that you’re going to have things like air conditioning, some of the air conditioning noise will be down there. If there’s any sort of resonance in the room, really low frequency resonance in the room, you’ll have some things down there and there might be other things in your room if you have a fan on your computer that’s running, this will help to remove some of that– not all of it, but some of it. The noise reduction is going to do some of it as well but that’s one thing and then it will also look for resonances where you, in your particular recording, have frequencies that are really kind of sticking out and making it sound harsh. This will actually cut those back a little bit as well so let’s demonstrate on my voice. We’ll just go ahead and leave it in automatic mode for now and here we go. [Playback] [Playback] [Playback] [Playback]
Okay, you’ll notice here it’s doing a cut here or between about one well starting maybe around one kilohertz and maybe up to two and a half kilohertz or so, there is actually typically a resonance in my voice and it’s cutting it just a little bit this is minus 6 DB so it’s cutting about 2 dB right here, just like kind of taking that harsh edge out of my voice a little bit and making it sound a little smoother. Now if you pop this out of automatic mode, you get a lot more control: you can choose the frequency you want to cut here in the middle; if you hold down for example the option key on a Mac, you can use the scroller on your your mouse or your touch pad and widen or narrow that a little bit. You can also do a high frequency boost if maybe you’re not getting a lot of crispness in the sound you need to boost that up you can do that here, or of course you can choose where to roll it off or where to get rid of some of that low frequency noise. And then of course you can choose how much makeup gain to apply. So if you’ve done all these cuts here what happens is that in essence the overall sound gets quieter, so you can boost the gain up after it’s done this processing. That’s what makeup gain does. In this case I’d probably go with the automatic mode; it did a pretty nice job on that, so I would trust it. And then finally we have our loudness boost. We can go ahead and use this to target the loudness that we want for our final video and in this case we’re targeting -16 LUFS. The target is LUFS, not decibels.
LUFS is loudness units full scale. It is a more precise way to measure perceived loudness the way that we humans hear loudness and so typically if you’re going to be posting your video online somewhere, I would generally recommend for videos that are not primarily music– if they’re primarily spoken word– I would normally Target around -16 and this just makes that automatic for you. All you have to do is drag the line to -16, set it to automatic mode, and it automatically does it. You can see it will dynamically adjust the levels; I’ll play through a little bit here. [Playback] [Playback] [Playback] [Playback]
So that’s doing a pretty nice job, you can see I kind of tried to trick it by pulling the loudness down quite a bit and then boosting it back to -16 and it takes it a while to adjust, but once it figures it out it definitely does a nice job of getting your overall levels close to where they need to be. So there, my friends, is a look at DialogueEnhance2 for those of you that need something very simple that can run from your non-linear editor, your video editing app, this is a pretty good choice whether that be Premiere, Final Cut Pro, DaVinci Resolve, whatever. Hope that was helpful, get out there and make some great sound, and we’ll talk to you again next week. [Music]