
Expander, Compressor, and EQ Setup on the Lewitt Connect 6 Audio Interface
· Audio · Post-production & software · 25:10
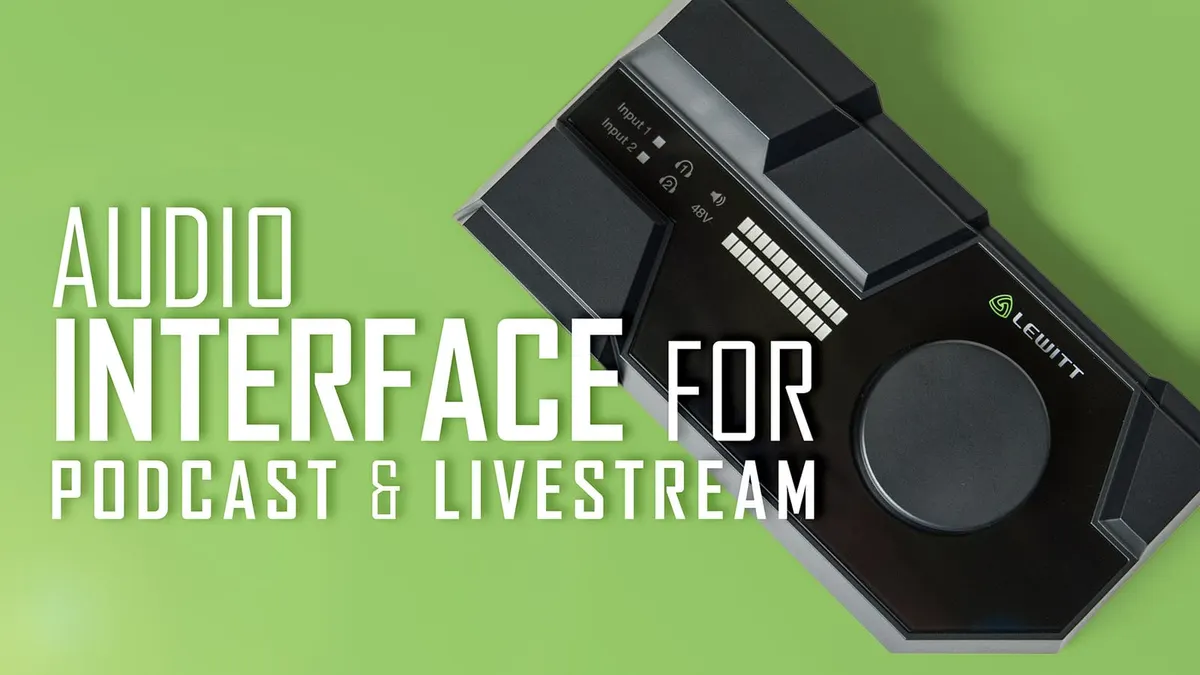
In this week’s episode, we demonstrate how to set up the expander, compressor, EQ, and maximizer for the Lewitt Connect 6 audio interface using its Control Center app. While we use this very specific app, the settings we demo here are very similar on almost every expander, compressor, and EQ. Of course, our demo focuses on spoken word audio/dialogue.
Podcastage review: https://youtu.be/JtSTbinmx1I Julian Krause review: https://youtu.be/o_8rCMJLM7g
Gear used or mentioned
The links below are Amazon, B&H Photo, Sweetwater, or other affiliate links. As an affiliate, I earn from qualifying purchases.
- Lewitt Connect 6 USB Audio interface — B&H, Sweetwater
- Aputure LS 300X used for background light — Aputure, B&H, Amazon
- Aputure Spotlight Mount — Aputure, B&H, DVE Store. Amazon
- Rosco Gobo creates the pattern on the back wall — B&H
- Canon C70 cinema camera — B&H
- Canon RF 24-70 f/2.8L lens — B&H, Amazon
- Schneider Radiant Soft 1 diffusion filter — B&H
- Panasonic GH5 camera — B&H, Amazon
- Panasonic 12-35mm f/2.8 II lens — B&H, Amazon
Read the transcript
[Music] foreign [Music] we’ll take a look at the control center app for lewit connect 6 audio interfaces this is not a review of the audio interface although I would recommend if you are interested in the details on that two different reviews number one from podcastage and number two from
Julian Krauss I put links for both of them down below take a look at those if you’re interested in those details let’s talk specifically about the Connect app now one of the wonderful things about the lewit connect 6 is it has inbuilt
Digital Signal processing DSP and what that means is that it actually has an expander sometimes known as a Noise Gate a compressor an equalizer and a maximizer or what is often referred to as a limiter so I want to run through those specifically we’re not going to talk about the other mixing features here we’re just going to focus on those particular settings so let’s go ahead and jump in first with the auto setup now the auto setup will automatically set up your microphone input gain and also some of the processors as well so let’s go ahead and show you how that works I’m using a condenser microphone in this case this is a Earthworks ethos that you’re hearing me talk through right now and first it asks you what type of microphone you’re connecting again this tutorial is all focused on spoken word audio not on music not on singing vocals not on instruments so if you have a condenser microphone of course you choose that if you have a dynamic microphone you choose that if you’re not sure what you have look at the documentation for your microphone so we’re going to choose condenser microphone the reason that’s important by the way is that if you do choose condenser microphone it will turn on plus 48 volts phantom power condenser microphones typically need that okay next it asks us what we’d like to do of course as we mentioned we’re doing spoken word so we’re going to choose talk next it asks you if you’re doing live audio like for a live stream or a recording and the reason it asks that is that it will do a different type of setup or configuration for you based on what you choose if you choose live it is assuming that you’re doing a live stream so you might want in those cases to use an EXT standard so it will configure the expander to manage any noise in your room it will also set up the compressor and equalizer to kind of fine tune your voice if you choose recording it is going to assume you do not want to do the expander so it will not configure the expander it may just look at the compressor and possibly The Equalizer so in this case let’s go ahead and choose live so we can see what that looks like first thing it wants us to do is record an audio sample for 10 seconds and it will figure out what kind of input level it needs to set or to gain level specifically let’s go ahead and do that and let’s see what it gives us okay I’m talking here for 10 seconds into the lewit connect 6 with the
Earthworks ethos microphone and this is going to help us figure out what level we need now Not Unusual the first time it says no calibration response received please repeat so in that case we’ll repeat okay we’re doing this the second time for whatever reason the first time it often fails I don’t understand why that is but in any case we’re going to go ahead and repeat so that it can figure out what our level needs to be okay so you can see already it changed our input level from 20 to 23 DB of gain and I probably sound a little bit louder now so that’s about right and you can see on our meter here we’re peaking probably or topping out at around -12 maybe just a touch over that at the start of a sentence so that’s a pretty good level next it’s going to test to see if we have any ambient noise and we’ll go ahead and start the measure and see what it recommends there okay that second case I didn’t do any talking I just let it record the noise in the room the noise floor and this is what I came up with first of all because we chose the condenser microphone it turned on 48 volts phantom power that makes sense it pretty much always turns on the high pass filter which is an 80
Hertz high pass filter that’s just going to take care of any low frequency hum or rumble or anything along those lines not completely take care of it but at least reduce it some can also be useful for air conditioning or Heating and again it’s not a perfect solution it doesn’t absolutely remove those things but it does help as we noted before it set our gain level to 23 DB of gain it also turned on the expander and the compressor so we’ll go ahead and click finish setup okay so that’s what it gave us and this is what it sounds like now let’s go ahead and turn and take a look at what it did to set these up and also how we can fine tune it for our particular situation so first up we have the expander now before we go any farther with the expander
I want to go ahead and turn on a noise Source in our room so we’ll go ahead and turn on a fan okay I’m going to go ahead and turn the expander off for just a moment so you can hear that fan in the background okay now we’ll go ahead and turn the expander back on and kind of tune it to get everything so that it’s reducing that fan noise in an effective way in a way that doesn’t sound too obvious and that works well for us so the first thing is we have a threshold setting we then have a ratio attack release and maximum reduction if I stop talking you can see a couple things here’s our input level the level that’s coming into this expander processor you can also see when I stop talking this little blue line shows how much it’s actually reducing the noise just a couple DB maybe three DB and this is the output level right here okay so the main idea is you want to be able after it’s done the processing this is the level and you can see right now it’s basically identical it’s not changing it by the way for any of these radial controls if you just click in the middle and move up and down that will change that setting for you what we want to do here is move this up so that it’s below the dialog and you can see it’s representing the dialog here as these sort of kind of like waveforms these are you know your audio levels here you want the line the threshold to be below all of your dialog but above the noise floor here and if I stop talking again you can see that’s all the noise from the fan right there so we are technically above it but let’s see what happens if we move it up a little bit higher and I can do that two ways I can grab it here and you can see as I move it up we can we’re starting to reduce more of that noise now it’s reducing it by about 12 DB so I would say somewhere in about the minus 55 range that’s pretty good okay the standard ratio that it almost always applies in all of my experience with this so far is that it will always set it to one to two this is basically saying how much expansion it’s doing how much noise reduction in this case it’s doing if we set it to a higher ratio watch what happens to the noise reduction when I stop talking you’ll notice it starts doing more noise reduction so that’s what the ratio does it works very much like a ratio on a compressor so the higher the ratio the more compression it’s going to do
I would probably keep it to again probably around one to two is probably fine so that you’re not I think this My
Philosophy with a expander in particular is that you don’t want to push it too hard because then it becomes really obvious to the audience because it’s not reducing any of the noise while you’re talking it’s only reducing that noise when you stop talking and so that’s why it’s important not to push it too hard because it will sound really obvious in fact let’s go ahead and do that so you can hear exactly how obvious it can sound and here’s when I start talking when I stop talking it’s pretty obvious that that’s kicking in so let’s back that off a little bit here and I’m going to use some more reasonable settings in this case a one to two ratio and in this case we’ll probably make our Max reduction about 12 DB there we go okay and actually I’m going to move that threshold down a little bit as well what the attack refers to is that when you stop talking this is how long it waits before it really kicks in and starts reducing the noise and you want to have a little bit of time there so it’s not too obvious but if you put too much time it’s it’s it’s it maybe is a little bit more obvious so here’s an example of using an attack that’s probably too slow here how it kind of eases in over the course of three quarters of a second so usually about 0.2 which is 200 milliseconds is about right in my experience for most spoken word you might need to tune that a little bit depending on how quickly you’re talking or what the maybe the the type of voice that you have but I think 200 milliseconds or 0.2 is a pretty good setting now when you do start talking again the release is what defines how quickly it turns off the compressor or the sorry the expander in this case so you definitely probably want to leave that right around 10 milliseconds if you go too long this is what will happen is it’ll cut off the first part of your next sentence so it’s you have to be really careful with that so I would generally leave that at about 10 milliseconds that’s enough that doesn’t sound too obvious but it also um doesn’t get it in a way it doesn’t keep reducing the levels when you start talking and then finally as maximum reduction and in this case I generally recommend -12 or less if you can again the philosophy from my standpoint is just to make the background noise less notable noticeable not to absolutely crush it into Oblivion because when you crush it into Oblivion it’s very obvious that you’re crushing it into Oblivion so I would stay away from that so that’s how I would set up the expander and with that we’ll go ahead and turn off the fan for now now as the fan is spinning down just a thought here if you’ve got a fan like that running in your room you probably need to take care of the fan just turn it off that’s the best that’s the best approach from my point of view but the expanders there if you absolutely need it I’m going to go ahead and turn that off for now and next let’s go into the compressor so what does a compressor do a compressor you can see here it’s representing my talking right here in this graph and the y-axis here is amplitude how loud I get at certain points and then of course we have a threshold here and anytime the audio the the spoken word gets above that threshold you can see that the compressor kicks in you can see it’s a little bit jerky Herky jerky here and that is because the app is just that way it’s not because my computer isn’t very powerful enough this is a Mac Studio with plenty of resources but for whatever reason that’s what it does so whenever the audio goes above the threshold then it does its compression it pushes those levels down a little bit and then once you’ve done that you can also do what’s called makeup games so you push those loudest Parts down just a little bit to reduce your overall dynamic range the difference between the loudest parts and the quietest parts and then once you’ve reduced those loudest Parts a little bit you can push the overall levels up so it has two effects number one it evens out the dialog and number two it allows you to make the audio just a little bit louder a little bit more present and a little bit easier for your audience to listen to so that’s what we use a compressor for typically now this one also has the input and the output meters you’ll notice that the output meter is consistently higher that’s because we’re doing some makeup gain here we’re adding 6 DB of gain after the audio goes through the compressor and you can also see here we have a little meter here the the red that comes down from the top here that’s the amount of gain reduction it’s doing at any given moment and then we also have that represented over here in red on this graph that shows when it’s actually doing some compression and you’ll notice it mostly happens at the start of the sentences or when I get really really loud if I get up close to the microphone and talk louder you can see it does more compression so let’s talk about how to set this up the auto setup actually does a pretty good job I’d say you really don’t want to push the compressor hard you just really want to even things out a little bit and it’s doing that pretty nicely here actually so the first setting of course is the threshold just like I described earlier when you’re audio goes above that threshold that’s when the compressor starts doing its job otherwise it doesn’t touch the audio all right so the next is a ratio a ratio is how much it’s going to squash the audio down once it does exceed that threshold now four to one is a pretty good place to be for spoken word audio in my experience and what that means is that when the audio at least in in kind of theoretical terms when the audio goes above the threshold by say 4 DB it would actually push that down it will compress it so that it’s only one DB above the threshold generally how it works and again if you push it really really hard
I think it starts to sound pretty unusual let’s go ahead and do that just so you can hear what that sounds like so I’m going to drop the threshold and now we’re doing a lot more compression and you can see or here actually use your ears here don’t worry about the visuals you can hear that it’s really affecting my voice in a pretty extreme way so let me go ahead and drop that back out and let’s drop that ratio back down to four to one four to one seems to be a much better place to be now even if I drop the threshold again and it really starts compressing it’s going to be a little bit more transparent it’s still going to sound that it’s obviously compressing but it’s a little bit more transparent and again that’s why you want to generally choose somewhere around four to one for spoken word audio okay next is attack and release these kind of go together what the attack does is that when the audio exceeds the threshold it essentially awaits this long it well the the full compression doesn’t happen until you’re this far into it in other words once the audio exceeds the threshold it takes this long before the full compression ratio is kicked in that’s essentially what that means and then on the other end once the audio drops for below the threshold it takes this long before it lets go it turns off the compressor again so in this case we’re doing 10 milliseconds attack so once the audio exceeds the threshold it will not get to its full four to one compression ratio until it’s been 10 milliseconds and for the release once it drops below the threshold it weights 80 milliseconds before it lets go and stops compressing now generally for spoken word I would keep it around 10 milliseconds on the attack and then for the release you could go a little bit longer than that maybe 200 milliseconds would be okay what you’ll notice is a difference here is if you go if I go really long what happens is it starts to also it takes a while before it turns off the compressor and so things like breaths become more kind of prominent because what it’s now doing is it’s actually compressing those breaths as well and you really don’t want to do that so that’s why I would generally stay somewhere closer to 200 milliseconds that’s 0.2 on this or where it actually originally recommended 80 milliseconds somewhere in there I would I’d probably go somewhere in between the two of them let’s go at 200 milliseconds and that’s about what that sounds like there okay I think the idea generally in terms of setting the threshold you don’t want to be compressing really hard again if I move this threshold way down you can barely hear me it’s way over compressing and so what we want to do is I generally want to set this so that it’s just barely getting the loudest Peaks maybe at the start of the sentences so for example here at the start of the sentence it starts compressing and then once we get past that it doesn’t do nearly as much compressing until I get to the start of the next sentence and that’s a lot of people will and it will kind of talk that way louder at the start of the sentence and then sort of mellow out the rest of the sentence so
I would say that you’re really looking for this to just kind of tickle the compressor not constantly have it engaged so just a little bit of compression every now and again to even things out generally works well and then you have your makeup game what I would do here is look it over these meters over here on the right hand side what you want to do is just keep your eye on this here you you know our levels now are peaking somewhere around -12 ish and I think that’s a pretty comfortable level you just don’t want to do too much makeup gain if you really start to push it here is here’s 12 DB of makeup gain and we’re still in a pretty safe area we’re still peaking at about -6 but I would I would save that for the maximizer I think we’re going to just do about 60b of gain make that up and I think we’re in a good spot there okay so that is the compressor now let’s talk about the EQ now there are a couple things you can do with the zq I’m going to go ahead and just sort of reset these here and turn that one off we can actually turn these off as well what the EQ does for you it allows you to I think the way
I think of it typically is that you can use it to correct problems specifically if you have a recording or a voice in a microphone combination that just kind of sounds a little bit too harsh you can use this to help remove some of that harshness and it will just make the voice sound a little bit more natural or if you want to you can do some sweetening they’re kind of the same thing at some level but let me just show you a couple things here you can actually use the the band One for a low cut filter or high pass filter they’re the same thing they just roll off the low frequencies and again that’s going to help with any sort of low frequency sound you may have in your space and it doesn’t usually cut into the dialogue if you for here for example we’re at what 51 Hertz we’re usually fine with even with men’s voices if you go up to somewhere maybe around 65 um that usually will be okay it won’t cut off a lot of the low end and that can be a helpful thing so if you want to do that this is available here you can also change the different uh types of points that you’re using here so for example over here on Band 2 let’s go ahead and turn Band 2 on and let me just demonstrate how I would go about doing a couple things now if I boost this up let’s go ahead and boost it up right here our uh first I need to turn it on make sure you turn it on so when I turn this off or move this point back down and then I boost it up you should be able to hear a substantial difference we’re getting a lot more of the one kilohertz range here and I could also sweep it over a little bit and here’s the two kilohertz range these kind of start to sound a little bit like a 1940s microphone recording not a great sound but this is a one one technique you can use to find the places where it’s harsh here’s a here’s like a super bass boost you don’t want to do that that can be really fatiguing to listen to but here for example this sounds really really harsh to me my voice this microphone this particular frequency sounds really really harsh and what you can do is you can actually drop that down maybe do just a mild cut here now what you can do as well actually before I do that let me just do one other thing if I hold down the command button and then move my mouse up and down I can change how narrow that boost or cut is with this particular point and so I might want to do something a little bit more targeted here so that’s changing the width or the
Q kind of related Concepts not exactly the same oh but notice that right there here how that sounds there’s a good example of the kind of harshness that you want to probably get rid of so what I can do then is just take this and pull it right on down and I don’t want to do a huge cut just a few DB maybe 3 DB is a good place to start so let’s do that with this one as well what I’m going to do first is again hold down the command key and I’m going to make this a much narrower kind of Point here now let’s go ahead and pull that up here oh whoops we got to turn that on if it doesn’t if it doesn’t do anything you got to make sure it’s powered on here so now we’re powered on okay here is ooh listen to that not good and I could sweep it back and forth and see what I get at these different frequencies here again is a super bass boost ooh that gets really resonant there oh my goodness not good there a whole bunch of spots there this one is sounding pretty harsh to me as well so I’m going to go ahead and drop this one by about 3 DB as well so that’s that’s going to be a pretty mild way to do it if I wanted to widen those up to really kind of make it a a wider area that it cuts again I can change the Q maybe drop it down like
I need a 1.3 let’s do the same over here whoops again just about a 3 DB cut and then I hold down the option or sorry the command key and we’ll widen that back up okay so here is with the EQ turned on and here is with the EQ turned off so you can hear the difference now I don’t think my this particular microphone needs a lot of that so take it easy it’s always less is more it’s a I think I would probably just boost this up a little bit doesn’t need that much of a change with my particular mic you can also take this if you do have a lot of sibilance you can use this as sort of a de-esser it’s kind of a crude way of doing that but if you can pull this down she sells seashells as I say uh well first of all what is Siblings siblings is a sizzling sound you hear when someone says the letter s or c and usually that will happen somewhere between five kilohertz maybe four kilohertz up to about 10 kilohertz and the idea is you want to cut some of that it’s not the best way to do it but if you’re in a desperate spot where you you know you have a lot of sibilance and you need to to manage it I’d go ahead and turn this on and then start saying she sells seashells by the seashore now here’s something interesting she sells seashells by the seashore she sells seashells by the seashore she sells seashells by the seashore and just how it’s starting to sound she sells seashells she sells seashells by the seashore a little lispy um you’ve probably found the frequency where the sibilance is and you want to back off you don’t want to do anything too extreme there but that’s one way you can take care of sibilance as well with an EQ all right now we’ve also got this gain here so again if you you know once you start pulling things down here your output level is going to be a little bit lower so you can boost it up here by a few DB if you need to do that and that’s how the equalizer works once we have our compressor and equalizer set we’re probably pretty good here but we could turn on the maximizer as well and the maximizer does two things number one it boosts the audio levels but it also has a limiter so if you boost a little too far or you happen to get a little out and gets through the compressor this also has a limiter which will push those levels down and prevent the audio from clipping so there’s my jacket you heard just a moment ago let’s go ahead and turn the maximizer on and see what we get here okay here is the maximizer now you’ll notice here when I get a little louder it will actually use the limiter to push the levels down starting to sound a little distorty to me I’m going to pull that back what we’re looking for is our meters over here we don’t want to be up against zero the whole time so I’m going to pull it back just a little bit I’d like to be maybe peaking around -6 and this will give us just that little extra boost we need to get there now if you see this little orange dot here when that grows that means it’s limiting so if I talk pretty loud here you can see it’s pushing those levels down a little bit it grows and shows that it’s okay pushing down so that’s how the maximizer works I think it’s a bit much to be honest I think back here is about where we need to be so this is about where I would go for this particular setup here okay so hope that was helpful for you if you have any questions go ahead and leave those down below and if you’ve not already subscribed make sure you do that and we’ll be sure to get you more great videos on how to improve your Lighting and Sound for video talk to you soon [Music]