
Sound for Video Session — Mix music behind dialogue & Q&A
· Audio · General / technique · 1:11:44
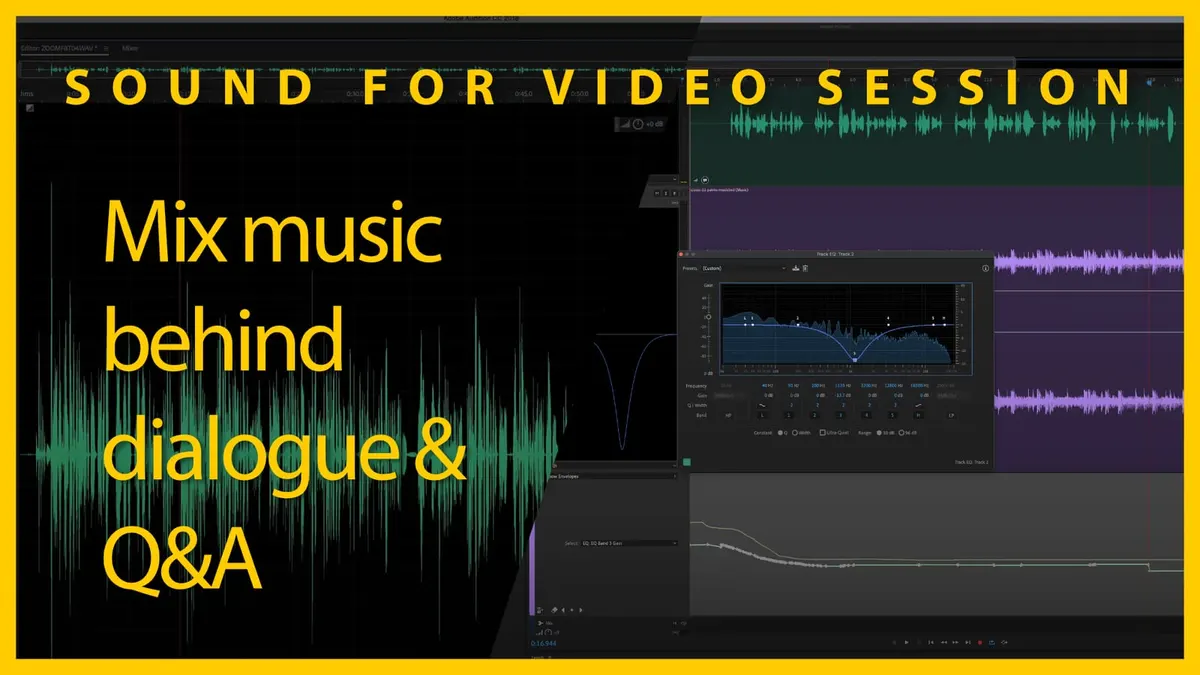
In this week’s session, we’ll demonstrate how I approach mixing music behind dialogue. Then we’ll answer your sound for video questions.
Gear I often use or that we mentioned in this episode. The links below are Amazon.com, B&H Photo, Sweetwater, DVE Store, Waves, or other affiliate links. As an affiliate, I earn from qualifying purchases:
Gear used or mentioned
The links below are Amazon, B&H Photo, Sweetwater, or other affiliate links. As an affiliate, I earn from qualifying purchases.
- Earthworks ETHOS microphone — B&H, Sweetwater
- Sound Devices MixPre II Series Recorders — B&H, Sweetwater, Amazon
Read the transcript
foreign foreign foreign foreign foreign
Hello soundies welcome to our sound for video session it’s good to have you all here today hope you’re all doing well it’s the 16th of October 2022. um it’s getting a little chillier here uh we have to wear our light jackets now um we have uh some exciting things to talk about today but before I talk about that I realized this morning when I was setting up the live stream for today I after last week’s session I um I just listened back kind of as a quality assurance check just to see how things streamed out actually on the stream and I realized I thought well the sound isn’t that great like it’s something’s something’s a little off about the sound and when I was setting up today uh I realized what had happened was that on my on the shelter channel the the um preamplifier equalizer compressor that we send the audio through for my mic here uh I had bumped one of the one of the knobs for The Equalizer the mid-range was turned way up so we had a little bit of a telephone voice uh going on so I think we’ve got that corrected and it should be sounding better this week than it was last week I bumped it because I uh I vacuum the room here once a week and I I put the furniture brush on and and you know keep all the dust off of the equipment as well and so I think when I was doing that is when I bumped it so it would have sounded something a little bit more like this if you can hear me talk are you hearing that that’s that’s what was happening so we turned that back down and this is what it should sound like more like this so let’s go ahead and jump over to our agenda and we’ll take a look at what we’ve got going for today.
By popular demand last week and specifically a request from Rob Christensen we are going to look at mixing music behind dialogue in other words if you have music and dialogue at the same time putting the music kind of behind it so that you can hear the dialogue but not turning the music down so much that you almost can’t tell it’s there that’s a kind of ongoing challenge I think that most of us face at one time or another and we’ll demo that in a couple of uh scenarios I’ll show the principle again the principles apply for pretty much any mixer that you’re using so if you’re doing this live or if you’re doing post-production you can do it in almost any digital audio workstation so I want to demonstrate how to do it in two cases here we’re going to use a black design sorry Blackmagic design atem Mini which has the software mixer which includes the tools that we need including a fader and an equalizer and then we’ll also show how to do this in post in audition in audition we can also use another tool called side chain compression so we’ll show you how that works as well so you know you have three three options here and we’ll we’ll talk about that in just a minute and then we’ll go over to our question and answer we actually just had one video um questions submitted so we’ll talk to that uh after we do our demo so let’s go ahead and switch over to the Mac first of all and right now you’re hearing me.
And what I’ll do here is I’m gonna I’ve Got the Music that’ll be coming in in just a moment here on this channel called Mac so it’s on the computer here and um I’ve got an equalizer as well I’m going to go ahead and reset this okay so first let me just play the music so that you can hear what what it would sound like if we’re kind of competing with one another so I’ll play the outro music this is you’ve heard this before okay so now we have music playing plus me talking at the same time and uh that kind of competing with each other and an obvious thing to do is to just grab the fader and pull that music back problem is is at some point you start to lose the music you can’t hear the music nearly as much or it’s just sort of this very faint thing in the background so another thing you can do is maybe not pull the fader down quite so much we’ll boost it back up some here and instead I’m going to go into my equalizer so on the A10 mini that’s right here I grab this here now the thing is is the intelligibility for voice is mostly in this kind of between 500 and 2 kilohertz range and if I pull the levels on the music down in that range you can hear it makes a pretty substantial difference so I can still I can boost some overall levels of the music up a fair bit and yet you can hear me but you can also hear the music a little bit better than you could before and let me just play the music without and with the equalizer so you can hear here’s with and here’s without okay so when we pull that mid-range down in the music with an equalizer they’re not competing nearly as much and you can tune this you know wherever you want it to be so we’re going through our Bridge here on the music boom.
Okay so there’s an example of one thing you can do so instead of just taking the fader and pulling it way back which is uh now you can’t you can you know it’s still there but you can’t hear it as prominently and what we can do this is kind of one of the basic principles of mixing actually making space for you can think of it in terms of my voice being an instrument versus all the other instruments in the music we’re just making space for my voice and that’s kind of the basic idea so that’s one way you can do it live if you are working on a mixer or you have a software mixer like this one thing you can do to make that work so let’s go ahead and stop the music here okay there we go we’ll get that reset Danny just reminded me to get that reset so that when we’d when we’re done with the session here we can pull that back out.
Now a couple of things on the equalizer that’ll be important now when you first turn the equalizer on and this is true of most equalizers they’re usually going to have a Q factor or sometimes it’s called width of about two but we generally want to widen that up some and so what I did is I actually set this to 0.5 and that makes it a much wider cut and again makes it a lot more space for my voice you can tune that you know to whatever makes sense for your particular case but usually going to want to go pretty pretty wide and this is kind of a to be honest this is a bit of a brute force method um and we’ll we’ll talk about some more subtle methods you can use in just a moment here in post.
Okay so that’s the example there let’s go over to Adobe Audition and take a look here so here I have a voiceover track and in fact this is the voiceover that we did last week where we demonstrated how to clean this up in izotope RX and this is the final one that I delivered to Alan and you’ll note here this is actually pretty loud um we’ll come back to that but here’s the music that I want to mix and what you’ll notice about that is that it’s extraordinarily loud it is pegged right up against zero DB just barely preventing itself from clipping and distorting in fact if we come over here to our amplitude statistics in audition and if you don’t see that in your copy come up to the window and choose amplitude statistics so that you have a check mark next to it and go ahead and just scan this file here and this is sitting at -6 or sorry minus 9.66 lufs that’s extraordinarily loud in fact once we mix these together we’re gonna have to pull that way back because that’s way too loud and then let’s go take a look at my voiceover my voiceover is probably too loud too for the overall mix we’re probably going to need to pull this down this is sitting at about minus 15.58 minus 16 roughly we may want to pull that down a bit as well because when they’re playing together remember that’s additive and so as I’m talking and the music is playing at the same time the overall mix level will be louder so let’s talk about how we would go how about mixing these together.
So first I’m going to come up to the multi-track button right here we want to create a new multi-track session and I’m going to call this dialog music mix and that’s fine we’re going to go ahead and we’re not going to choose a template I want my sample rate at 48 kilohertz that’s what all the audio is at we’re going to do 32-bit float is the bit depth and that’s just for the processing and then we’re going to do a stereo mix and click OK and that gets us to this UI here so now I have multiple tracks where I can lay things out so let’s go back to our files up here and I’m going to first get my voice over and put that on the very first track and in fact I can rename the track here whoops call this Curtis dialog DX for dialog we will go grit that music and we’ll put that right here and we’ll make this our music track here that’s our music track now I have all these extra tracks here I really don’t need them so I’m going to come up to multi-track go to the tracks Sub menu and I’m going to delete empty tracks so that takes us down to three now I have my dialog the music and the overall mix this is the output this is the what everybody is hearing down here.
Okay so first we have this problem where I have my dialogue and the music are just way too loud so I need to take care of those so what I can do is just double click here um and let’s bump both of them down to -24 and the way I can quickly do that is I’ve got this match loudness panel down here if you don’t have that you can go to window match loudness that’ll show up here and you can kind of resize some of these windows here I’m going to grab both the voiceover and the music drop them both down here in this window and I’m going to set them to minus 24 lufs so let’s go ahead and do that and you can see the waveforms change that’s looking a lot more reasonable now and here’s the music now uh looks a lot different so this is of course what the music sounds like okay and in fact we’re just going to use this bit here I think yeah we’ll cut right whoops cut right there that out that’s that’s fine okay now we’ll go back to our multi-track there we are okay we’re getting a little warning here because I cut that after we put it into the multi-track session but that’s that’s okay we can dismiss this warning it’s okay we meant to do that.
One thing I will typically do just when I’m when I’m mixing multi-track In audition one thing that’s pretty useful to do is actually to do a command a to select all of the tracks and then come up here to clip and lock in time so if I’ve got it laid out so that they’re in sync for example with video you definitely want to lock things in time so that you don’t accidentally come in and you know just with your mouse bump something out of out of place so that lock in time right here will keep it in in sync that’s a kind of a useful tip for avoiding mistakes you know auditions.
So let’s go ahead and play this and see where we’re sitting right now might be a little on the loud side for a future episode send a written audio or video question to SSP at soundspeeds.us.com okay definitely competing right now so we’re definitely going to need to do some things here.
Now we could do the exact same things that we did before so I have right here I’m just opening these tracks a little bit in fact let’s go back to how I had that and I’m going to just use the roller on my on my mouse here to increase the size of all of these tracks and I don’t really need to see the mix track right now I just mainly need to see these two okay so I can go ahead and here’s the essentially the fader or I can come over to my mixer I just do this I have faders here so I can just take the music and I can pull it down some so let’s go ahead and play it back and do a little bit of that sound speeds with an S at the end dot us want to record this outro well you can’t I’m recording this outro but if you’d like to record the outro for a future episode see the details in the description below find sound speeds on social media and on so I had to go down to about -18 on the music to really kind of make sure that the dialogue was coming through okay that’s a lot um and we we may want to do that or we might not.
But let me just uh also come back and show you another oh let’s come back to the multi-track here I want to actually there is another feature in audition that some people use and that is the essential sound panel and what you can do here is you can identify each of your tracks so here I have dialogue so that’s my voice over I’m going to click that’s dialog and then over here I have music so I can click music and I can tell this to duck in other words to kind of move behind the dialogue and I have all these settings to make that happen and you’ll notice when I do that it actually you can see right here it is it’s drawing in a line here that shows that it’s going to pull that music down and in fact if we just uh go farther out and as you can see once I stop talking that level comes back up let’s go ahead and see how that sounds just out of curiosity if you’d like to ask a sound related question for a future episode send a written okay so kind of the same thing I was doing before but it’s basically automating so it’ll play the music at full volume at first then when I start talking it will pull it down now we have a variety of settings over here that we can work with to change you know how it’s doing that my dialogue is coming pretty quickly so I don’t know that it makes a lot of sense to kind of boost the levels back up between phrases because they’re just taking a pause to take a breath and things like that so not necessarily something you’d want to do but just so that you’re um so you can see what some of these these settings do let’s say for example I want a duck this is It’s dropping at 18 DB maybe we don’t want to drop quite so much maybe we’d say let’s try and see what it sounds like we tried this before maybe minus 14.
Let’s talk to be more sensitive Watch What Happens here if we if we’re more sensitive and we reduce the fade duration ah what look at look at those little lines there see what it’s doing it’s actually boosting those levels back up let’s see what that sounds like just out of curiosity if you’d like to ask a sound related question for a future episode send a written audio or video question to SSP at soundspeeds.us that’s sound speeds with an S at the end dot us want to record this outro well you can’t nope that is definitely not what we want so that’s one that’s an example of it getting a little too fiddly and definitely not something I’m watching you’ll notice those will all disappear as soon as I increase this fade duration and this is a number in milliseconds so right now we’re at uh oh 500 milliseconds that means that it’s going to fade for at least half a second basically before it checks to see if there’s another pause in the dialogue and once we do that you can see it drops all those others so this is pretty pretty good um it’s not perfect but it does get you pretty close and it’s easy to use.
The problem is is that it’s doing the same thing we were doing before and just basically pulling the fader down it’s not doing the EQ approach that we were showing earlier so it’s not always the very best so I’m going to go ahead and turn that off for now and we’re going to go ahead and close the essential sound panel but just so that you’re aware that is there and it is a fairly easy thing to work with if you just need something quick and dirty and a lot of times I think you’ll see video editors will do stuff like that so not a bad way we can do a little bit better as well too though.
Okay so let’s um let’s go ahead and pull the fader down well actually the one thing that the essential sound panel did that we are not doing here is that it automated the levels so in other words it let the music play at full volume until I started talking and then it pulled it down and we can actually do a similar thing using what’s called automation within Adobe Audition so what I can do here is I’m going to come to let’s see here I can actually do any of these but I want to come to this little drop down here so this is the automation right here and I want to change this to let’s choose latch okay what this will do is this will let us change our fader level while we’re playing the music back and it will record those fader changes and that way those are kind of baked in so it’ll automatically do what we want it to do so I’m going to switch over to my mixer and start the playback and adjust the fader here we go if you’d like to ask a sound related question for a future episode send a written audio or video question to SSP at soundspeeds.us that’s sound speeds with an S at the end dot us want to record this outro well you can’t I’m recording this outro but if you’d like to record the outro for a future episode see the details in the description below find sound speeds on social media and online at www.soundspeeds.us be sure to subscribe and turn on notifications for more sound related content and what I mean is if you really want to learn something you should subscribe I learn new things from Alan all the time one time I was listening to this episode and my mind.
Okay now if we come back here and in fact we’re going to roll this down right here and scroll up a little bit and you can see our fader movements right there recorded our fader movements so at the start we started talking and then I pulled the fader down and you can actually edit these as well in fact if we zoom in here you can see we have individual keyframes there and we can just grab those and once it has this little square next to the arrow I can just grab that one and move it to wherever I want or I can actually even delete them as well if I just press the delete button on the keyboard once I’ve highlighted it we can delete that so I was a little bit late on the fader I would probably come in here and maybe let’s see we’ve got a lot of I got a lot of these in here we probably don’t need quite so many incredible resolution it was recording with but we might want to fade down just a little bit sooner and we can do that and grab these and tune this all day long we can spend all day long with a mouse or you can come in and use the fader to to match those I want to get rid of some of these there’s more than we need here.
Okay so you get the idea there so that’s one way we can do it now we can also apply that EQ that we were talking about before and there are a couple of ways to do that in Adobe Audition so I’m going to actually for now I don’t want this I want to go back to read what read means as far as automation is concerned is that now when I play this back it will read what we did with our fader during playback so let me play it back for you and you can hear if whoops I didn’t I made a mistake we’re going to undo all of that there we go okay so let’s go ahead and play it back now if you’d like to ask a sound related question for a future episode send a written audio or video and that was without now I’m going to turn it to read and this is what it does question two SS whoops back to the start here we go to ask a sound related question for a future episode ah it turned it off again my mistake read back to the start okay now if you’d like to ask a sound related question for a future episode send a written audio or video questions okay so that’s how that works.
Now we can apply an equalizer to the music track as well so we can just come in here if we wanted to do it this way come into filter and EQ and choose a parametric equalizer and do a very similar thing I don’t need the high pass filter here but let’s maybe grab this whoops this one here again here’s the Q or width if you will we’re going to drop that down to a smaller number maybe to somewhere around 0.4.5 and I can just grab this bring it up into that range between oh about 502 kilohertz and drop it there so let’s go ahead and do some playback and I’m going to go ahead and do that so we can hear how that sounds if you’d like to ask a sound related question for a future episode send a written audio or video question to SSP at soundspeeds.us that’s sound speeds with an S at the end dot us want to record this outro well you can’t I’m recording this outro but okay so similar type thing there but you might ask well what about at the start of the track do I really want that EQ at the start when we’re first playing the music because it’s going to sound a little bit muffled it’s going to have that massive EQ cut like this I’d like to ask a sound related question for a future episode we can actually automate the EQ as well which is pretty exciting.
So what we can do is let’s go in here we’re going to show the parametric equalizer and we’re using band number three and we want to automate the gain on that okay so we’re starting right here and let’s go ahead and put that in latch mode and actually let’s put it in right mode I’m going to just rewrite it all together so and then I want to show that parametric equalizer so let’s start with it at zero okay and then let’s go ahead and start playing back to the start here we go if you’d like to ask a sound related question for a future episode send a written audio or video question to SSP at soundspeeds.us that’s sound speeds with an S at the end dot us okay let’s see what that did it looks like it did it okay let’s go ahead and change that back to read and we’ll play that back read okay this is what it sounds like now if you’d like to ask a sound related question for a future episode send a written audio or video question to SSP at well wait a minute I’m not sure that worked you’re seeing this line here which is what let’s see what that does if you’d like to ask a sound related question for a future effort okay that actually did work so that’s one way to do it another way is we can actually remove some of these here we can erase or reset things so that’s actually reset it there there’s the volume um there’s the parametric equalizer and we can reset that so if you needed to start over that’s how you reset that’s the Eraser or clear all keyframes right there so now we had the the um the volume was pulled back too much so what I want to do is I want to re-record that and actually I think what I’ll do is I’ll do the EQ first and then come back and kind of tune the volume in.
So let’s change to the parametric equalizer let’s go to right let’s go to the start of the track open up our parametric equalizer start playing if you’d like to ask a sound related question for a future episode send a written audio or video question to SSP at soundsfeeds.us that’s sound speeds with an S at the end dot us want to record this outro well you can’t I’m recording this outro but if you’d like to record the outro for a future episode see the details in the description below find sound speeds on social media and online at www.soundspeeds.us be sure to subscribe and turn on notifications for more sound related content and what I mean is if you really want to learn something you should subscribe I learn new things from Alan all the time one time I was listening to this episode and my mind okay so you can see here now if I expand this there is our EQ so I pulled that just that one parameter down and you can see as we change it back to read you can see watch the EQ there as I get to the end and stop talking we pulled that back up so that’s how automation for an equalizer works.
Now let’s do the same thing except for this time the volume or the fader if you will one over here and here oh wait before I do that you do have to change it from read to latch okay back to the mixer and we’re going to pull the volume down as we go here we go if you’d like to ask a sound related question for a future episode send a written audio or video question to SSP at soundspeeds.us that’s sound speeds with an S at the end dot us want to record this outro well you can’t I’m recording this outro but if you’d like to record the outro for a future episode see the details in the description below find sound speeds on social media and online at www.soundspeeds.us be sure to subscribe and turn on notifications for more sound related content and what I mean is if you really want to learn something you should subscribe I learn new things from Alan all the time one time I was listening to this episode and my mind was blown okay.
Now we’re going to come back over to the multi-track session and there’s our automation for the fader or the volume as Adobe Audition refers to it don’t know why they use the term volume but okay so here is what the final piece sounds like and you’ll notice when I did the fader I only had to pull up back between -9 and minus 12 as opposed to -18 so we didn’t have to pull it back so much because we had applied that EQ as well so this is what it sounds like now if you’d like to ask a sound related question for a future episode send a written audio or video question to SSP that sounds and then jumping ahead new things from Alan all the time one time I was listening to this episode and my mind was blown okay so there’s an example of how you can do that in Adobe Audition with both The Equalizer and the fader and you can automate it as well so some some techniques there now there are there’s another technique as well this one’s a little bit more fiddly but what you can do as well is with the diet you can do what’s called um side chain compression so what side chain compression does is going to compress the music when I talk and the way you set that up is you actually just put a compressor in here.
So I’m going to come in and say let’s go they call it Dynamics here in in Adobe auditions so there’s that one wait a minute that’s not the one I was thinking of um Dynamics processing is the one I was thinking of okay and I’m going to go ahead and come on over to the settings tab here and here’s the gain processor and actually what I’ll do is I’ll use a preset here just to make things quick for us let’s do a soft limit so it’s it just changed some of the settings here so I want my output gain to remain at zero and the attack time to be very fast I probably want my release to be not so fast probably about 400 milliseconds roughly and let’s listen to what that does to the music so right now I haven’t sidechained it yet all I’m doing is is basically compressing here and I actually need to see where these Peaks are so I know where to set this here um and maybe maybe not let’s see let’s see what that does for the music so here we go if you’d like to ask a sound related question for a future episode send a written audio or video question to SSP at soundspeeds.us that’s sound speeds with an S at the end dot us want to record this out okay see this red bar here that’s how much attenuation it’s doing there so it’s it’s it’s pushing things down between nine and six and 12 DB maybe so let that that is just kind of crushing our music that’s not helping us right now.
So let me just show you how you would do the side chain so to do that you you would come up here into this little setting here this is the sends and we’re going to send in essence what we’re going to do is we’re going to tell the compressor to look at the dialogue to know when to start compressing but apply the compression to the music so all I need to do is come to this one right here um and go to side chain create Dynamics processing it’s on the music track slot two so I’m just going to go ahead and click that okay now when I play this back watch the uh attenuation here and let’s see what happens if you’d like to ask a sound related question for a future episode send a written audio or video question to SSP at soundspeeds.us that’s sound speeds with an S at the end dot us want to record this outro well you can’t I’m recording this outro okay so that’s another thing that you can do now this one is you have to dial the settings in just right for it to sound right that was sounding a little weird to me um personally I would probably just skip the side chain altogether since it’s a a long string of dialogue if you have a lot of pauses in your dialogue this can be helpful but in this case here I it’s another technique you can dial it in it can work pretty well it allows you to not have to attenuate your music nearly as much and still be able to hear the dialogue but I just wanted you to see that that’s an option out there as well and um yeah okay that’s what we had prepared for the demo let’s go to the chat here and see what questions we have in the chat so far.
I’m going to take a sip of water I’ve been doing plenty of talking here this is my uh mute things a little bit okay from Christopher that is one thing to be said for digital controlled analog gear much easier to make sure patches are correct that’s in reference to vacuuming oh that regarding vacuuming okay got it thanks Christopher yes um indeed Daniel says I presume one would fine tune the frequency one brings down for the music to complement the voice men’s voices would have a lower frequency pulled down yes I think that’s true and yeah you can just use your ears when you’re pulling when you’re use working with EQ you can slide those parameters back and forth you can move it to a lower frequency a lot of the articulation is actually still in the same area for men’s voices as women’s voices so um you know this is kind of just a rough we’re roughly making space um you’re not going to necessarily hear all the richness of men’s you know if you have a men’s voice with a man’s voice with a lot of low frequency content to it we’re just trying to make a little space and yeah you could you could drag the EQ down a little bit Daniel absolutely just experiment with it and see what works best and you don’t have to use just one uh you can use multiple points in a parametric equalizer so if you need to cut a really the thing is is the more you cut out of the music the less you’re going to hear of the music so it’s finding that balance is kind of the art to it this was a while ago this was a while ago volume dip is still active with EQ and it makes it excessively quiet agreed that’s why we went back and reset that so great Point agree with you entirely there.
Momo hey everyone dumb question this is just a demonstration right in this case you normally set Keys manually correct when you say set keep like Keys as in keyframes I’m not sure I understand the context of that question exactly but this is just a demo yes.
Shoji do you ever just drop the overall music level during the dialogue using versus using EQ or do you always EQ and mixing music behind dialogue I almost always use EQ the problem with just using the fader or dropping the volume is that you lose the music at some point and then it just becomes almost like noise as opposed to music that’s why I think using EQ is important and helpful is that with the EQ you’re you’re still keeping some of the bass especially in popular music keeping more of the bass and the high frequencies where there’s not as much stuff going on with the dialogue and so the music is I think psychologically people are hearing the music to a greater extent if you use EQ versus just dropping the level.
Foreign works with longer release times but you’ll have to adjust the length of the void a voice possess not sure I follow that entirely so yeah you definitely you can you can adjust the release time um again use your ears to figure out what that sounds like the trick with audition is that not all of in and this is true of actually all plug-ins not all plug-ins are side chain capable so um you have to use you know in this case I don’t do we even have a release setting on this I don’t know that we do I’m going to just take a look at it here now we do have a release here and we had it at 300 milliseconds you could drag that back and forth to tune it in um that’s why it sounded a little bit it wasn’t too fiddly the longer you take it the more it’s just going to keep things compressed the shorter you set the release time the more quickly it’s going to recover the music and bring the music back so the way I approach that is just use your ears and drag that back and forth to figure out where the right setting is there’s no it’s not like you can just choose a number choose a number for dialogue it doesn’t work that way it’s always use your ears and and move that release time back and forth until you find what actually sounds right in this case I probably would just do a wave of the side screen compression altogether I think the EQ and the fader is doing enough for us and in light of the the dialogue itself I don’t think it was necessary so that’s how I would approach it.
Pauses oh pauses my mind okay got it yeah that that’ll change the pauses if you will by by adjusting that release time and filling those in in the right way oh I mean I meant the live King setting keyframes during playback I really find practical use for features like that that’s true but some people don’t like working with like it’s totally fine if we come back on over to audition here um yeah you can just in fact we can just say we’re showing the volume right now let’s just reset that you can literally just come in and drop a keyframe pull another one in drop another one in drop another one in you can totally do that if you prefer working with your mouse by all means work with your Mouse um it’s it’s totally personal preference completely and totally Some people prefer to work with faders and that’s that’s fine too I think I’ve only tried side com side chain compression before I uh yeah I will have to go at the EQ way now thanks for showing how it’s done you’re most welcome Andy uh I think that additionally by the way um you can combine those two concepts as well you can actually use Dynamic EQ which is essentially it’s a kind of a combination of side side chain compression and EQ at the same time so instead of compressing the entire music signal you’re just compressing say in that middle section between 500 and 2000 or 2500 kilohertz um or 2.5 kilohertz so you’re just in that case you’re not compressing all of the sound just of the music just the middle portion and making room for the voice so you can do actually both if you have a dynamic equalizer so that’s another option as well you can see with audio processing there are millions of options and different ways to approach this and finding the one that just sounds best to your ears is the number one thing.
Also I want to talk about that a lot of times people kind of second guess themselves and say oh my ears aren’t that well trained your ears are pretty well everyone’s ears are pretty well trained everyone spends um their days listening so you actually can hear better than or if you’re if you’re second guessing yourself on that front you can actually hear better than you think keep practicing that’s another thing just keep practicing practice practice practice and you will get it okay anything else going on in the chat there all right well let’s just go ahead and play um I think we just had one thing to play back here uh go to the Super Source there we go okay so Rob did say here’s my video it’s a I thought it was a question thanks for this episode feel free to share with my fellow soundies it’s also my first use of the DJI mic on location so to speak I’d love to hear your thoughts so let’s go ahead and play that back for you and here we go.
That’s good anyway Curtis um I first of all I want to say thank you very much for dedicating an episode of your live stream your wonderful live stream uh to my question from last week I’m really looking forward to the answer um but not today uh I’m on vacation right now and uh the Acropolis awaits my friend.
Okay so um Rob that that was um I just wanted to say first of all I think that’s great I hope you enjoy your trip there to Greece uh enjoy the Acropolis there I am really happy for you and I’m also a tiny bit envious so um uh but I’m curious what people thought about the DJI mic to me it sounded pretty decent I think that’s a pretty good use case for the DJI mic that was a review we did probably I don’t know three four weeks ago we did a review of the mic and one of the things I did point out was that it does have uh it’s not the cleanest in terms of self noise but I think that’s a perfect illustration right there of where it didn’t doesn’t need to be uh perfectly clean and so for a 329 dollar device it has two transmitters to a single dual Channel receiver it’s a pretty good it’s pretty good so I wouldn’t have any qualms using it the video was out of sync that’s probably an issue on our end.
Here so Daniel that’s don’t don’t judge Rob for that that’s that has to do with our playback system here I got it just before the live stream so I didn’t get a chance to fix that no wonder there was no Rob stream this past weekend yeah if you it made me think actually uh gosh 20 plus 25 years ago I don’t know when it was uh there was a Yanni at the Acropolis concert and this made me think way longer than that maybe it was even longer than that but it made me think Robbie at the Acropolis uh so enjoy your trip Rob really excited for you um I thought it sounded pretty good too I think that again that’s a good use case Daniel says sounded fine to me and that’s that’s a case where especially and Matt says he’s been very happy with him that’s a case where pristine uh performance in terms of self noise is not necessarily going to be a factor if you’re using that out vlogging it doesn’t matter there’s so much noise in every space you’re going to be vlogging in that is irrelevant at that point to some extent so um good use of the DJI mic there all right let’s go to the chat for General uh questions Johnny at the Acropolis was definitely more than 25 years ago early 90s there you go or something like that 30 years ago then okay all right Danny’s going to take a look through our chat here and see what questions we got.
Uh Danny I know you offer a course on izotope RX but in regards to mastering audio for video is there a course for ozone which I believe contains highly refined ducking I do not have a course on that I’m not as familiar with ozone to be honest so for those that are not familiar with ozone ozone is another izotope product and it is used primarily for mastering music however it can be used of course for film and video and it’s just one that I have I do have a license for it I just haven’t dug into it quite as much um what it does really well is that it’s really good at loudness normalizing so it makes it the process of you know how a lot of times when you when you have to when you want to hit a target a loudness Target you say for example -16 for YouTube or even minus 14 if you wanted to go that that loud for spoken word I would probably keep it closer to minus 16 but if you want to do that the compressors that it has built into that are just so nice so fairly transparent and they’re super easy to use so that’s one thing that we should definitely take a look at but Danny I don’t have a specific course on that yet great idea though I like that idea and it does yeah it also has some ducking capabilities in there as well.
What is generally recommended for educational content music or not this is purely opinion um I don’t I I did that at first on my YouTube channel but um a lot of people complained about it and I didn’t necessarily like it a lot there’s been some psychoacoustic research suggesting that there are some kind of soothing or calming benefits for it uh with it with music playing behind I would use this more in a um like a narrative context narrative video versus an educational video I don’t like leaving music playing the entire time that’s my personal preference it doesn’t mean that it’s wrong to do it I know Rob’s live stream I think they at least they used to play music behind and I think that’s perfectly legitimate so I think it’s really a personal thing I think for educational content though I generally personally prefer not to play music behind it at the intro and outro yes but not not while I’m talking through the whole thing.
Darren says DJI Mike sounded good but the GMT Swatch stole the show Good Good Eye there Darren yep the GMT watch stole the show indeed yeah he’s he’s it’s pretty it’s actually pretty prominent I think he’s on his left wrist there teacher teacher speaking of not trusting one’s ears on My Talking Heads uh films people with Bassy voices appear to sound louder than others even though the Peaks are consistent am I crazy you are not no that’s not at all unusual so that’s a great illustration of where Peak amplitude does not equal loudness okay really really important to kind of drill that into your mind if you’re looking at things visually even if the Peaks are only at -6 on one track and they’re at minus zero or minus one on another that doesn’t mean the one with a minus uh one Peak Max is louder it does not mean that at all that’s why we use loudness units full scale so you are absolutely not crazy and that’s that’s not at all unusual.
Okay there’s two to this okay two-part question here Yani at the Acropolis was in 1995. actually 1993 according to YouTube there you go almost 30 years and now in 2022 we have Robbie at the Acropolis you mean you don’t carry your mix pre with noise assist on holiday I know um you could if you had a mixed pre 3 and you’re really dedicated I suppose but um yeah not necessarily necessary for certainly for vlogging at least uh Pro Copy I’ve been experimenting with waves Clarity tried to insert it into rx9 as a plug-in makes me think that izotope won’t take 64-bit plugins but I couldn’t find any details on izotope website any ideas um I don’t I don’t know I have you can I pull Clarity VX in here I don’t know don’t uh let me take a look and I’m going to be an rx10 I don’t know if I have Clarity VX no don’t switch let me just take a look here really quickly I’m going to go to the plugins I am going to go to select plugin I don’t appear to have the waves plugins on here so I don’t have that right at my fingertips apologize for that Pro Copy um I don’t know are you on windows are you on a Mac and when you say 64-bit plugins are you talking about vst3s so just a couple follow-ups there if you have that info would love to dig into that a little bit more.
Uh Matt has a strong opinion uh I uh yeah it doesn’t like music behind intro outro break only yeah that’s kind of my Approach yeah but again it’s personal it’s all personal can be it can work either way all right people if you have other questions go ahead and drop them in we’ve got another 10 minutes here would love to see what else you have to say um this was at the beginning but you kind of covered okay this is at the beginning let’s talk about side chain compression mid side EQ weird um hopefully we didn’t lose anybody there but the choice of music that you’re going to put behind dialogue I think is also very important that’s a great point I’m glad you brought that up PJ um yeah choosing the right music so use your ears again find something that’s going to sit behind the dialogue in the way you want it and also carry the emotional weight or message that you’re looking to carry as well so I think that’s important as well it’s a good point there.
Some of those others I’m not as familiar with your okay pro copy your Von VST on Windows so vst3 I don’t know I didn’t I’ve never tried to use uh clarity in izotope RX because I had dialogue isolate there so I didn’t mean to pull it in there I didn’t have any problems with Clarity VX in Adobe Audition or I think I used it in logic as well no problems there but I haven’t tried it in um isotope RX so I can try that next time I I have to go back and reinstall I won’t do that here on the live stream but we’ll take a look at that when I get an opportunity if anyone else knows bile it’s a weird anyway hope that’s not affecting the stream doesn’t look like it is um good stuff Julian is a is definitely a staple for me we use it on our all of our live streams uh for work I monitored the audio using Julian and um Rogue amoeba audio hijack and so I actually bring up the live stream we do a test live stream beforehand and we actually stream it to YouTube and I monitor it from the YouTube stream itself not from anywhere earlier in the signal chain using audio hijack and Julian and we’re able to get a really good read on where things are sitting so it’s been a really useful tool um voice meter I haven’t I haven’t played with that one as much or actually ever curious to know how that works.
Getting some buffering pauses in the Stream okay weird glitches in the Stream YouTube is having server issues uh make sure it’s not my on my side here everything’s looking okay on my encoder so yeah it could be a YouTube thing okay any other chat Danny’s going to pull those up for us here two part do you have a recommendation for lav mics mostly for short films YouTube videos but maybe some client work if it’s good enough I’m a cameraman mainly so it shouldn’t be too big of an investment I usually rent audio gear so I am not that deep in the topic I I assume Momo you’re running the audio directly to camera is that the case I mean there it depends on what you want um if you’re just if you’re mostly doing talking head and working indoors the Sennheiser AVX is really easy to use and it sounds good um once you get outside I think you can run into some distance issues with that system but it’s it’s um it sounds good and it’s reliable indoors and easy to use so that would be my recommendation on that front if you want something if you’re going to have someone actually operating a sound mixer and you’re you know somebody could be dedicated to that while you’re working on camera um then I think the the question is a very or the answer is a very different answer versus if you’re a camera Operator just trying to manage the hundred things that you’re trying to manage lighting camera sound interviews uh your craft Services your everything everything um in those cases I think for audio it’s best to keep things as simple as possible and as straightforward as possible so that’s my general approach if you are a dedicated sound person then that’s where I would move into a UHF system of some sort depending on what kind of budget you’re looking at and how many channels of audio you need.
We just did a review to that went up this morning about the audio or sorry I I still Trip on this it’s the sound devices a20 wireless system which is an extension of their original A10 which is the main system I use so they have dual Channel slot receivers so I’ve got four channels of that plus I’ve got four A10 transmitters and a20 transmitter um um so yeah I just you have to have somebody that’s you either have to get that set up all ahead of time there’s a little bit more work in terms of you have more flexibility because you can choose different frequencies and definitely ensure that you get a signal through but it does take some time to set that up and it depends on if you’re a solo operator doing everything that’s where those kind of systems are harder to operate with potentially unless you really dive in and learn them well and get them you know have enough time to set them up ahead of time so those are some thoughts there hopefully that makes sense.
Have you reviewed the senken csm1 or csm50 um no not the csm1 the csm50 I did review one of their stereo shotgun mics they have some really unusual mics the sinkins um let’s see what that one is c s m 50. one second csm50 that’s the short stereo shotgun mic I have not reviewed that they have a longer short uh shotgun mic stereo mic that I reviewed a long time ago probably 2016. it was fun but it was one of those things it was eighteen hundred dollars I think and it just wasn’t something that I was going to use a whole lot I I just borrowed it for the review but um no I haven’t I haven’t reviewed those I can say this the sanken it’s it’s gonna be personal preference is going to be whether it fits the voice that you’re using it on I found the sink and mics to me work really well on some voices and and this is true of most mics actually they if they sound I don’t know I have never been the biggest fan of the sink and sound that doesn’t mean that they’re bad mics I want to be very clear about that but they’re just not my favorite Sony likes on most voices on some voices they sound good um they tend to be from my point of view a little bright and a little bit mid heavy uh personally but that’s just my own personal preference or my own my own ears and my and what I’ve observed so they’re not bad mics I’m sure sanken makes great mics they have lots of production sound mixers have used them but I haven’t reviewed those particular ones.
Darren thank you so much for the Super Chat uh always appreciate the time and after the Judd team puts into educating the group thank you so much that includes Danny that includes Emma who is now our producer for the main Channel um so she’s you’ll notice she’s appearing in those a little bit more and she’s doing a lot of the behind the scenes work on those as well so thanks to Emma as well.
Can you recommend some music sites for use in Productions oh my goodness okay let me say this I have um I’m glad you asked um this is tricky so the I’m an affiliate in full disclosure I’m an affiliate for musicbed the the tracks that we play at the start of this and the end of this are musicbed tracks and at same with the the main YouTube channel what I really like about musicbed is that the artists that make their music available via musicbed get to retain copyright on that music so they can still use their own music for their for other things they can put it on Spotify for example they can sell it via other other places they don’t have they’re not exclusively able to sell or play the music just for musicbed so um to me that seems the fairest thing for the artist so that’s why I like music bid the challenge with musicbed is that um and actually the process there’s an update from when I talked to you earlier this morning so the way that it works with musicbed is that when my videos go live on YouTube and I guarantee you if I pulled up my email I bet right now it would say that your live stream uh there’s a copyright claim on your live stream because the music belongs to somebody else and as soon as my live stream is done within a couple of minutes It’ll remove that claim and say oh yeah you’re actually licensed you’re good to go so they have to do it that way because of the way they set things up so because they allow the the musician or yeah the musicians to retain copyright so it makes things a little bit more challenging that way but it you know the worst that’s ever happened is some somehow the copyright claim didn’t clear on one of my videos and so I had to send an email to musicbed they cleared it up as soon as they got it they read the email and then it was good to go.
Now there are lots of other music sites out there music stock Music Services out there there’s um art list comes to mind premium beat is another one that I’ve used before in the past distant past um premium beat does an interesting thing where they sell not only the songs themselves but music packs where you can actually get a loopable portion of the song which can be useful for video so that’s another thing to consider but right now I’m a music bed affiliate and I do like the selection the selection of Music on musicbed to me is one of the best I’m always able to find something there that that kind of fits the vibe or the emotional feel that I’m aiming for with the music so that’s why I’m a music bed affiliate.
Uh Christopher says a lot of music behind audio is done with short music loops and those get really repetitious fast yeah I agree it can be tedious that’s not what you want when you’re playing music you’re not looking for adding tedium to things I did a short iPhone app tutorial and without the music you at times might think the video was stuck the music provided a forward movement during the app pauses so it worked for me I felt and that’s fair totally fair I think it can work just I think it also just depends on the context it’s all context dependent.
I mostly rent a zoom h4n personally I have an h1n and yes I mainly work alone so I have to do both in that case I DJI mic uh rode Wireless go to um Sennheiser AVX like we talked about if you want something with an XLR output I don’t know what kind of cameras you’re running with but um yeah those are the the what I do when I’m operating solo as I actually use my sound devices mix pre usually the mix pre 3. um or I just bring my whole my my regular audio bag which has the sound devices 888 which is overkill in a lot of situations but um then I run the the then I have the wireless all set up in that bag so for me that’s easy um but if you’re going to run audio directly to camera the if you’re going to go into something like an h4n the problem the problem potentially with the zoom H series is that I don’t know how well shielded they are so if you get a lot of radio frequency activity right next to them it can potentially be problematic but you’re putting the receivers there so probably not an issue.
Yeah but I I mean if I’m going to look at consumer Wireless my first choice would probably be the rode Wireless go second choice would probably be DJI mic if you want to moving up to something with an XLR output then I would probably look at the Sennheiser AVX or the Sennheiser G4 or the Sony Sony has a digital wireless system in their naming conventions are so crazy I don’t remember they’re so wild that I don’t remember the model numbers but the I think it’s the uwp-d system um that’s one worth looking at it as well if you go to the Sennheiser G4 or the Sony that’s when you’re getting into the situation where you’re choosing frequencies that’s that’s a mix blessing it’s wonderful because you now can choose from a whole variety of frequencies so if you show up in a location and the wireless isn’t working because there’s too much Wi-Fi um with a consumer Wireless Systems you’re out of luck you don’t have a great solution unless you’re using those new ones that record on the transmitters and so you’re just basically hoping for the best hoping there’s not a bunch of clothing Russell because you can’t monitor it if you turn it on and use it as a recorder but um with the UHF systems then you can um you know if there is a TV station nearby for example or some other radio frequency in the in the default or in the the frequency that you’re tuned to you can tune to a different frequency and avoid that altogether so and if you’re going to use a lot of channels of Wireless more than two that’s when a UHF system makes more sense to me so those are some thoughts there.
Okay we’re wrapping up teacher teachers I am glad to hear I’m not crazy it is is it common to EQ Bassy voices to get them a little less Bassy I ask because once I started touching EQ I make things worse well you can just roll off some of the lows yeah I mean especially if it’s if it’s starting to sound something like you know really really heavy Bassy like that then yeah that can be fatiguing to listen to and it can be hard to understand if they have a really dark Voice without a lot of articulation then definitely roll off you just apply a high pass or a low cut filter and just just use your ears pull that pull the frequency up until it starts to sound more normal or if it starts to sound you pull it up and until it starts to sound thin like a radio an AM radio voice and then pull it back some bring a little bit of the base back and so that you can understand it well and that’s a good spot to be right with that.
Oh mark That’s one word Danny says this is the last one um thank you thanks for the recommendation I like the copyright process you mentioned with musicbed that’s a big issue in my world of still photography absolutely it’s important I think for artists to be able to sorry sorry Danny is gonna Danny’s ready for lunch are you hungry no okay I’m just kidding just kidding all right everybody well thank you so much for coming to the live stream today hope everything is going well for you get out there and make some great sound and we’ll talk to you again next week bye-bye.