
Sound for Video Session — Sound Devices 8xx setup basics & Q&A
· Audio · Recorders · 1:07:46
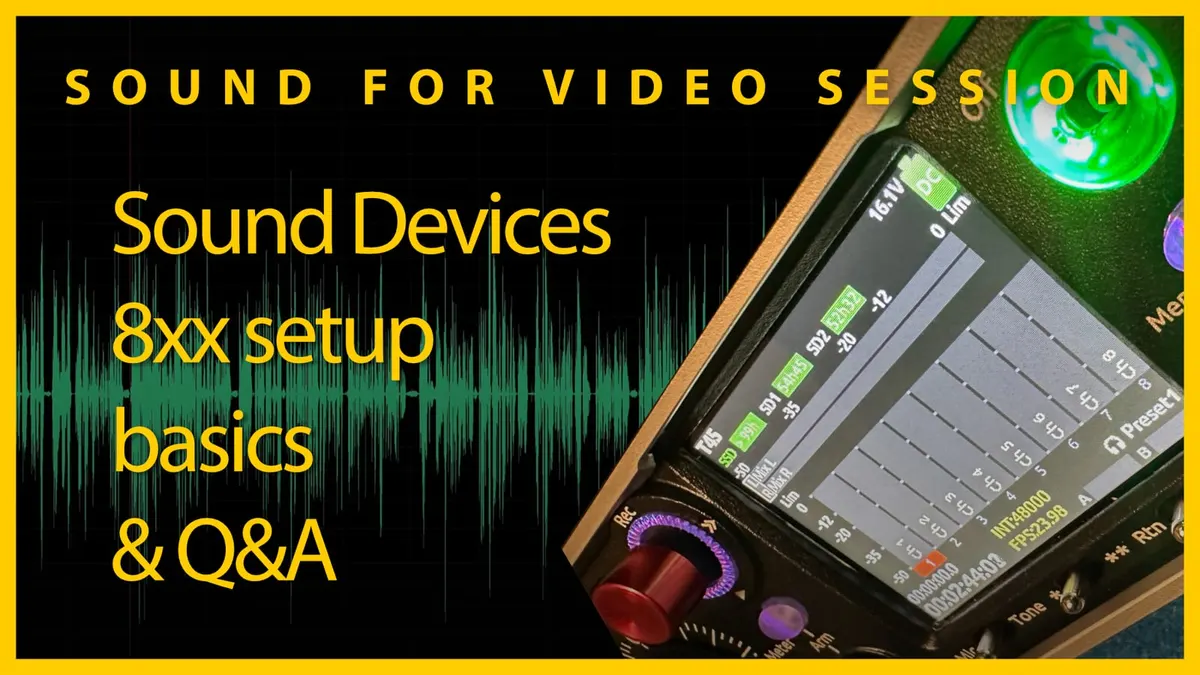
In this week’s session, we’ll cover the basics of setting up the Sound Devices 833, 888, and Scorpio audio recorders.
Gear I often use or that we mentioned in this episode. The links below are Amazon.com, B&H Photo, Sweetwater, DVE Store, Waves, or other affiliate links. As an affiliate, I earn from qualifying purchases:
Gear used or mentioned
The links below are Amazon, B&H Photo, Sweetwater, or other affiliate links. As an affiliate, I earn from qualifying purchases.
- Sound Devices 833 audio recorder — Trew Audio, B&H, Sweetwater
- Sound Devices 888 audio recorder — Trew Audio, B&H, Sweetwater
- Earthworks ETHOS microphone — B&H, Sweetwater
Read the transcript
foreign [Music] [Music] [Music] foreign [Music] [Music] foreign [Music] [Music] [Music] thank you [Music] [Music] foreign [Music]
Welcome to our sound for video session today is the 30th of October 2022. I hope everybody’s doing well out there had an opportunity to work on your sound projects this week and um hopefully you’re excited to talk about field mixers today like I am so let’s first go over to the agenda and take a look at what we’ve got going today first up uh talking about why we’re covering the sound devices 800 series recorders why why going into depth about that and I guess let me just go ahead and address that now so I have um
I guess I’ve kind of shied away from covering the more expensive gear because
I felt like it wasn’t as applicable to as many people in the audience and but I do get at least once a month oftentimes two or three times a month a request hey can you please cover how to cut how to work with the sound devices 833 or the 888 I don’t think I’ve ever gotten a request to cover the Scorpio but which is the highest end um sound devices 8 series recorder but in any case I try to do a mix I try to do a mix of much more affordable gear and in some cases more expensive gear so
I that that’s that’s the reason why I think today I wanted to jump in and talk about this in a little bit more detail now obviously a lot of people are not going to have access to these recorders uh probably don’t own them or may not have an opportunity to work with them however if you are in that boat My Hope
Is that you can get some exposure here to this level of recorder field mixer and at some point in the future if you do have an opportunity to work with them you’ll have a better kind of orientation tour toward how they work and even if you don’t I think it will help you understand a little bit better about how production Sound Works and how to record in general so that’s the thinking behind this we’ll of course jump over and talk a little bit about the setting up the sound devices 8 series and I’ll run through some of the menus setting up microphones setting up game forward wireless mics as well which is something we covered with the a20 mini a little while back and I’ll explain what all that means if that doesn’t make any sense to you and then after that we will head on over to the chat and see what kind of questions we have going there so with that let’s go ahead and head on over to um let’s go to the overhead camera let’s go ahead and jump right on in and here we have the sound devices 888 now what I’m going to cover here today is on the 888 but it generally will apply to the 833 and the Scorpio as well now there are some differences obviously between those three models the a33 just having fewer inputs the 833 not having Dante connectivity so you can’t pick up Dante audio sources on the 833 but you can on the 888 and the Scorpio those are those are kind of new nuanced differences that there are between them so we’re not going to worry too much about those because those differences are relatively minor for what we’re covering here today at least so okay so what I’ve got in this setup here this is the sound devices 888 and you can see we have four big knobs here these big knobs are the faders for the first four channels then we have retractable faders for the next four channels so if I push this it’s probably a little bit difficult to see there but that pops up and then I can use this as a fader for channels uh five six seven and eight and those just retract when you’re not using them so they can get them out of the way so I’m going to go ahead and turn this one back down and retract it um or put it put it back um so that’s what those are then you have these other knobs here this is your trim knob right here and this is also retractable so for channels one two three and four you have these retractable trim knobs trim being the same as gain in this case and then you have the same thing for inputs five six seven and eight down here so I have physical controls both trim gain and a fader for each of the eight physical inputs on the 888 okay now this is actually this can actually record up to 16 isolated channels and we’ll talk about that and how you access those others and where you get them because if this only has physical inputs for eight how do you get the additional eight well we’ll we’ll cover that a little bit later all right you also have these switches across the top here and these switches allow you to get into the menus for each of the inputs so this first switch here if I push it to the left that will take me into the input menu for channel number one you can see channel number one’s trim knob starts kind of flashing there if I want to go to input number five I push this channel to the right and you can see it’s not flashing because I don’t have it on right now now it starts flashing so there’s channel number five so I’m going to go ahead and turn that off go back to channel number one so that’s how you access the channel menus you have these physical switches to get in there and then we’ll pop back out we then have right here the recording or kind of the transport joystick so I don’t know if you can see this but if I push up on this it starts a recording if I press straight down on it like a button it stops the recording if I press down on the joystick it starts playing back the track that you have selected and if I press down again it stops that track and of course I can cue forward and backwards while I’m playing as well or this will cue between the different takes that I have on the card here you can see here in the top left corner here the T that’s referring to the file that’s take number in this case 48 it looks like so I can kind of just move through those by using the forward and back okay we then have two encoders here this is usually going to be by default the headphone volume knob here and this will be the menu encoder or Knob here now if I want also some buttons here if
I want to get into the menus I press this menu button right here that takes me into the main menu obviously the on and off switch right there um I thus then also have a button over here this can do a variety of things this takes me by default into my meter view so if I want to change the metering View
I can just choose a different metering preset here so here for example um there we go let’s come back to the standard view there so in the standard view you have a horizontal left and right mix meter and then you have vertical meters for inputs one through eight but again you can change that and you can go into the menus and kind of customize that to what works best for you in addition we have a couple of switches actually three switches along the bottom of the screen here that that fill different purposes there I would think of as kind of soft switches they can change depending on what you’re doing but I can actually turn on the Slate mic so now you can hear see as I’m talking there’s an inbuilt microphone here so the the Slate mic is picking up what I’m saying and if I press it again it turns off the
Slate mic the idea with that is that if you are getting ready to make a take to do a take you can actually turn the
Slate mic on so that you can hear the mixer describe what the scene is or leave a note or of some sort or if the if I’m at the end of a take and I know that this is a bad take we’re not going to use it I can quickly turn that slate mic on and say bad take ignore this one or some you know whatever kind of node I need to leave for the Post team or for myself if I’m doing the post that’s what that switch moving to the left does the switch moving to the right by default turns on tone so what that does is it sends a one kilohertz tone to all of the channels and that’s often used to make sure that your that your outputs are receiving um the right levels so if I’m going to
I’m going to send audio from this recorder into a camera for example I would turn on tone and notice it’s at minus 20 DB then I would go over to my camera and adjust the input level until the meters on the camera were also at minus 20 DB that way they’re calibrated between the two of them so that’s how you use the tone right there all right we have this star and double star key those are actually programmable
I can set those up to do whatever I want so if there’s something that I find myself doing over and over and over again I can actually program those to do those functions whatever those might be okay um the the this switch here where on if
I push it to the left it it allows me to monitor The Returned um it’s probably a little bit more complex and we’re really going to talk about here today but if I want to get audio from the if I’m returning audio from a camera say I’m sending audio from this to the camera and then from the camera back to this and I want to hear that audio coming back from the camera I would just push this to the left and then I can hear the return and all that’s doing is really making sure that the audio of the camera isn’t clipping and that you’re getting a good signal in the camera as well so that’s what that’s for and then I can I have this fave right here this will allows me to um kind of toggle through my headphone presets in this case you can see I can look listen to the left and right or I can go to preset one in my case preset one is actually listening to just the isolated channels so not the mix just a just a combination of the isolated channels so we’ll another time we can talk about headphone routing and all of that all of that entails but that’s just sort of a general view of things here in this particular case I also have What’s called the SL2 the slot the super slot attachment here and what this allows me to do is to attach two wireless receivers and send that audio directly from the receivers into the 888 without any additional wires or cables inside my bag here so it makes it a little tidier um but it also adds some other features as well so it can power these receivers and each of the slots on the receiver can accommodate anything that’s super slot capable any receiver that’s super slot capable and it can receive up to four channels of audio per slot so this
SL2 unit in whole in total can receive eight channels of wireless audio it also has some digital AES inputs so I can bring in additional digital AES audio so if I have some additional receivers that can send out digital AES audio I could also connect those into this and get those directly into the 888 in this case without using additional any of the additional inputs on the side of the 888 so that’s pretty nice thing there it also has connections for diversity antennas so you’ve got a connection one here and connection two here and what that does is with my diversity antenna so I have a shark fin antenna with a dipole secondary antenna and so that that connects here and here those two inputs the Shark Fin and the dipole and then those connect to the receivers which are diversity receivers and so the receivers can then switch back and forth between those antennas depending on which one has the better signal at the moment so that’s the idea with the SL2 just keeps things nice and tidy Compact and makes things really easy to work with the big Advantage too is that I can control a lot of this right here from the menus so I can control my um my receivers right here from the menu on the 888 I don’t have to I don’t necessarily have to use the menus on the receivers which are as you can see a little bit smaller well actually you can’t see because we haven’t turned them on yet but we’ll go into that in just a little bit okay let me go ahead and start walking through the menus here so you can see how these are set up here all right first up we have a power menu so with something like an 888 if you’re using a field mixer at this level and this is nearly a ten thousand dollar mixer this is the type of thing that you would typically see on a production film set or a production TV set um the important thing is that you need to have redundant power sources and in this case here let me just pull this down without hopefully jostling my microphone too much and over here I have a power distribution system in this case it’s the PSC triple play so it can take three different Power inputs and currently we have two smart batteries attached to it one and two but then on my sound card I also have a third very large battery of one kilowatt hour battery sitting down on the bottom of the sound cart and it does a couple of things obviously that goes into the third input here so I can power with three different batteries so if one of these run out or what the big battery on the bottom runs out it switches over immediately to one of these instead so that makes it a little that makes it easier so I’m not going to miss a take because my batteries ran out and I also have a bridge battery system in addition to that on the all three of them the 833 888 and the
Scorpio there are also Sony l-series battery Sleds on the bottom of the units
I don’t currently have any batteries attached there so these are kind of the pretty common npf style batteries
I don’t currently have those attached that’s why those are not showing anything at the moment but oh I need to move it back up because I am showing the other part here so let’s move that back up and into the frame about right there sorry so here’s the power menu apologies for that so this is showing that right now DC power is coming in and that’s being fed from the the triple play that we showed you just a moment ago there’s also an indicator here for the time code battery so there’s an inbuilt battery for time cut the time code generator inside the 888 and what happens the way that works is once you power on the unit which is powered from either one of those npf style batteries or your external uh battery distribution system it charges up this time code battery so that when you for example pause filming for a meal for dinner for lunch whatever you can actually power this unit down and that internal time code battery will keep the time code generator powered through the the meal easily for an hour or two and then that way you don’t have to jam again after the meal so that’s one thing there this uh these units also have been built Chargers so you can actually charge the npf style batteries uh from the other external power sources and also by the way you can plug in to this triple play power distribution system if I’ve got AC power I also have an AC adapter I can plug in to power the entire unit as well so if I do have AC power available then I don’t even have to use batteries okay so that’s just a quick overview of that menu we’re going to come back to the channel setup so it’s going to be the inputs for each microphone or line input Channel next up we have the buses and that’s probably a little bit more complex so since we’re covering the basics today we’ll probably come back to another session and talk about that but let me do go into the outputs menu and just give you a little overview on that so the 888 in particular has a left and right main outputs but it also has X1 through X8 or six excuse me six is it six or eight it’s um it’s eight so it has eight different outputs uh auxiliary outputs plus the main left and right outputs and what I can do is just Define what gets sent to each of those outputs now you might say that’s a lot of outputs and why would you ever need all those outputs and if you’re on a production set that’s where something like this becomes important where where something like a mixed pre or a zoom F series might not have enough outputs so if I need to send a mix to the director and I need to send a mix to the script supervisor and I may need to send communication channels comms channels to other members of the sound Department I might need different outputs because I want them to hear different things and what this output routing allows you to do is Define exactly what is sent to each of those individual outputs and so you can send a different mix to the script supervisor a different mix to the director a different mix to any producers a different mix to your the rest of your sound crew so on and so forth so it gives you a ton of flexibility on what exactly all those people will hear and this is just a pretty typical routing screen here where
I can Define um exactly what’s being sent so on a lot of the Productions I work on for example I might just send the boom microphone and not the wireless or the wires if as they’re confusingly often the wireless microphones are called wires um so but I might not want to send them all of that because those might be the boom mic might be out of phase from the lavaliers and I may just want them to hear the boom mic so they don’t get confused about what they’re hearing and they they feel confident that we’re capturing great sound for the production um for my boom operator again I might want to send both a boom mic or maybe I want to send the boom mic into the left ear of their headphones and I might want to send all the lavalier microphones maybe at a lower level into their right ear I can configure that here as well so that’s the idea at a high level with the outputs in the menu here now we have some other outputs as well we have Dante so what is Dante Dante is digital audio over an Ethernet Network so there’s an ethernet port on the back of the 888 and I can connect to a local area network and any other Dante audio on that Network can receive audio from my 888 so I can tell it exactly what to send to the
Dante outputs and you can see here we have 16 different Dante outputs now remember earlier I said hey we have these controls for eight physical inputs what about the other channels well here’s where you can control those there’s part of where you can control those other channels so these are the outputs that you have but we also have corresponding Dante inputs and we’ll come to that in just a little bit we also have USB outputs so if I’m connected to a computer I’ve got a USB port here if I connect that to a computer I can Define what gets sent to each of the USB outputs and then I also have the headphones and I can Define exactly how those are set up here and what I hear in my headphones now that can get that can be confusing you might think well why don’t I just want to hear everything in my headphones well sometimes you do and sometimes you don’t when you’re on a production set a lot of times I just want to hear the isos I’m not as I’m not necessarily focused on recording if I’m doing like a smaller job and I’m operating from the bag I don’t necessarily I’m not going to be doing a really sophisticated mix and so for me it’s more important to make sure that my isolated channels are sounding good and I’m capturing what I need to on the isolated channels so I might set up my headphone preset to to listen to that so obviously you can listen to the left and right stereo mix you can listen to the left and right summed down to Mono if you prefer again if you’re not doing any panning there would be in essence very little difference between those I can listen to
Just the left mono I can listen just to the right mono um all of those but I can also send out my own presets here and Define how that works okay so here oh and we would edit by doing the soft key there so you can see right now my headphone preset one is the pre-fader inputs from inputs one through four so I’m just listening to microphone inputs one through four uh before the fader any the fader makes any change to them and that’s exactly what I’m hearing in my headphones if I use preset one now the difference is between that if I come back out here if I’m listening to the left and right stereo headphone preset what I’m hearing instead and I can come in I don’t know if you can edit this one no that’s just a standard one there but what would happen there is if I did have any fader changes anything other than 0
DB to any of these that’s what I would hear instead I would hear the fader the effects of the faders in my headphones as well whereas if I went down to preset number one down here
I would not hear the effects of these fader changes that I’ve made okay because it would be sending the audio to my headphones before the fader hopefully that makes sense there and when you might want to do that again in my case because I was I’m not often working on a really sophisticated mix the mixes or in some cases not even recording a mix I’m just recording the isolated inputs a lot of times I’ll use that headphone preset so that’s the idea there and that’s outputs at a very high level next up we have our limiters here so the nice thing about the sound devices uh eight series is they all have these high quality Optical well I don’t know if they’re Optical they’re analog in any case limiters built in for each of the inputs and they sound great but you can also adjust some of their settings here so for example I can quickly turn all of them on or off by accessing that here whoops let’s go back into that menu foreign and the same thing with the bus limiter so I also have buses and we’ll talk about what that means in a little bit here well probably not in this session but we’ll come back to that in another session but you do you can route everything that’s the beauty of the sound devices 8 series is is fully routable that is to say input physical input number one doesn’t have to be controlled by channel number one controls it can actually be controlled by any any of these that you assign so if you want to instead for whatever reason put it on Channel 4 you can connect to a an XLR cable to input number one and control it with the controls for channel four and it is it becomes Channel 4 at that point so it’s fully routable which some of the earlier generation sound devices mixers were not and a lot of a lot of others are not so that’s one thing so where does that become useful um for me I think what I like to do is almost always have the boom mic on input number one I think typically most post teams are going to expect the boom microphone on input number one so if you for whatever reason have to connect the boom microphone to a different physical input you can still assign it to input number one as one example there are probably other things that you may encounter at some point but that’s one example there but any case I can I can fine tune the settings of the limiters here so all the channel limiters will have the same settings here based on what I configure here and I just leave these at the default typically minus 6 DB for the threshold and um a 20 to 1 ratio so basically it’s a compressor with a really pretty pretty um intense ratio so for every 20 DB of audio that exceeds the threshold it’ll be actually squashed down to 1 DB above the threshold so and it acts pretty quickly here so it uh the attack time is one millisecond and the release time is 100 milliseconds so we won’t talk about all the details and what that means but you do have flexibility to change that both for the channel limiters and for the bus limiters right there in the menu we also have Auto mix that comes on the 8 series at least it used to I think it still does and it comes with two different flavors it comes with a Dugan Auto mixing and it also comes with sound device’s own flavor which they call mix assist that’s the same mixes that you find on the sound devices mix pre-series and they’re just different algorithms they can they can be better suited for the particular use um the particular setup that you’re using so for example if I’m doing a if I’m doing a round table discussion what I generally find is that mix assist will give me a cleaner mix it’ll it’ll reduce more potential ambient noise from open microphones that aren’t currently being used however I find that the Dugan Auto mix generally sounds more transparent it’s less obvious that there’s some mixing going on so that’s kind of from my point of view that’s kind of the trade-off between the two but this is where you would enable this if you wanted to use mix assist or Dugan Auto mixing and you would just enable that right here and then what you do is you can tell it whether or not the LED rings around the channel will turn on and show what the active microphone is that’s what that does and then you can choose which microphones will be included in the auto mix and let’s say I have a four person discussion I might say inputs one through four should be
Auto mixed and that’s how you set that up okay we also have noise suppression and there are two different flavors of that on the sound devices 8 series there is a noise assist and there is also
Cedar DNX so I only have noise assist installed here you can see I can I can use a trial of Cedar DNX at some point
I’ll go back and do that but here’s uh mixes or sorry noise assist turned on and I can tell it where to apply that now I have on this particular license I can do two different channels of noise suppression so I can apply that to maybe channel one and channel 2 but you can see if I try to select other channels it won’t let me or I could say you know what I really just want to put this on the left mix so let’s just put it on the left mix and that way is everything good there’s a fan somewhere that just kicked on we’re not sure where
I don’t know um anyway excuse the fan apologies for that um but that’s that’s one thing I can do here so the the nice thing about this is if I just want to if I want a safety that is to say I want to applies noise suppression but I don’t want it to be
I don’t want it to destroy my isolated channels or kind of mess up my isolated channels if anything goes wrong I can apply it to a mix Channel or to a bus
Channel even and I can record that bus separately so in post that means it’s the post team would have a noise reduced
A pre-noise reduced mix of everything and they would also have the isolated channels and they would have a clean mix as well so that would look like this if
I were going to do that so I would get a clean mix clean isolated channels but I would have a noise reduced bus recording so that’s what that would do so again you can see this is I can’t I think I think kind of highlighting what features a high-end recorder mixer like this has that things like the mix pre-series or the zoom F series don’t have so it’s all this additional flexibility for meeting the demands on a production set kinds of things that people that are doing smaller jobs generally don’t need when I’m making
YouTube videos frankly I don’t need all this feel I don’t need these features generally or I can just use a mix pre that does have noise assist and just apply it to one channel or or just apply it to the mix or whatever um so you just you just get a lot more flexibility on things like this so that’s the idea with the noise suppression I’m going to go ahead and disable that for now okay next up we have meters and you can tell um we talked about the meter presets previously this is where you would set those up so you can have different views depending on what works best for you in the particular production you’re working on how many microphone inputs you’re using or other audio sources all right next we have time code and sync and we have a variety of different time code modes that are supported here I don’t want to get two in the Weeds on this but if you are using time code this is where you would set that up so in this case I have free run currently selected and this is where you set your frame rate and then if you’re going to jam to an external time code generator you would do it in this menu here you would connect your time code generator to the time code input on the side here it would read it um and then you would be able to jam the two of them together and this menu in this menu you can make sure that they’re actually entirely synced up and ready to go so um here’s another example of like the extreme flexibility of something like this different time code generators do their limo connectors their pin designations differently so they they wire them differently so you can actually change which type you’re using here that’s the kind of flexibility that you get with something like this that you typically wouldn’t have with with other recorders all right that’s an overview very very high overview of time code next up we have the recording and play menu this is where you set your sample rates and of course this can support anywhere from 44.1 up to 192 kilohertz sample rates and your bit depth here it supports 16 or 24.
I do get people asking well gosh you’re paying nearly ten thousand dollars for a mixer and it doesn’t even do 32-bit float and the answer is no it does not and typically in production sound I don’t think that’s really necessary most production sound mixers don’t have a pressing need for that if they are going to go record some sound effects where they do want to have um you know 32-bit float then they will typically have a backup recorder or they’ll have their small bag recorder or their second unit bag recorder which might be a mix pre which can do that so
I’m not making excuses or but but typically for production sound we just don’t need 32-bit float just really not necessary you have a dedicated person operating sound on the mixer they can handle the gain structure um and and they’re able to get everything done that needs to get done um you can also set up your pre-roll time and post roll time so you get up to 10 seconds of pre-roll time and 10 seconds of post rule time what does that mean that means when I start recording when I push up on the joystick it’ll actually take the 10 seconds prior and also record that so what what that means in Practical terms is whatever microphones you have attached to this and armed it is constantly listening to them and buffering that audio for 10 seconds so be careful what you say um but it also does that there’s a post rule time as well so when you press stop it’ll actually keep rolling for that period of time and again that’s up to 10 seconds as well now there’s this kind of unassuming menu here called track to Media routing um this is actually kind of a big deal and important and by default all tracks will get recorded to all three media now this has an inbuilt SSD drive but it also has two SD cards so every time you’re recording you can Define what gets recorded to each of those to the SSD drive in each of the SD cards and you can record just the isolated microphone or line level inputs just the mix just the buses or you can record all of them and the default is to record all of them but if you need to customize that for whatever reason you can do that right in here all right popping back out next up is the files menu whoops I accidentally helped out before we went to the files menu here we go files excuse me all right first up we have the take list and in here you can actually Define what your take is going to be called so if I come in here I can actually this is where I can enter a lot of metadata about the take so I can put notes on each track
I can leave some sticky notes um that get applied to all of them
I can change the scene name
I can change the or reset the take number
I’ve got the folder and project names and then I can actually name the input channel so for input number one for example if I want to change that from Channel One I can name it something else by coming in here and let’s say I’m going to call this the Boom
I’m just going to come in here boom and then save now channel number one is called the boom mic and in fact if I come back out to the main screen you can see now that this is named boom so that’s just a way to really identify everything and keep everything clear and straight because there’s so much flexibility you have to be organized when you’re working with a mixer like this and that’s one way to do that is to get yourself a little bit more organization and name all of the tracks so that’s the files menu in the files menu we can also of course format all of our drives so I can format the internal SSD drive the SD cards so if I come in here to let’s format SD card one it asks me if
I’m sure I say okay I can actually give that drive a name so you know when you format on your computer a drive it lets you name that drive this does the same thing so I’m going to go ahead and say save so that’s going to call that the 888 sd1 and now that’s all formatted and ready to go we can also transfer files off of the
SSD drive from this using a USB cable and we have some other options in there that we’re not going to jump into right now um that’s another thing about the 888 and the eight Series in general is that you do have some comms integration so what are comms when you’re on um on location or on set and you have a multi-person sound crew or you have multiple members of the crew that need audio or you need to be able to communicate with in a two-way fashion back and forth so for example if I’m mixing and I have a boom operator and I need to tell my boom operator hey can you please go check love the Lavon actor
XYZ um looks like we’re getting some cutouts there or we’re getting some clothing rustle there that’s what the comms allow you to do and in this menu you can set those up and choose the routing and how it all works and which microphone input you’re going to use to talk to your crew and so on and so forth and you can make sure that that communication only happens on the
Wireless feeds that you’re sending to your crew your sound crew and not to the director and not to the script supervisor or you might set up a separate column to the director if you need to get in touch with the director and you’ve agreed ahead of time that that’s how you want to do that then you can set that up to do that as well all right next up we have super slot and on super slot here I can actually first of all you’ll notice that these are turned off right now first of all I need to feed them power and so I do that in here um so we’re going to turn just this one on for our demo and it’s figuring out what kind of receiver is connected there right now because obviously it has to be able to communicate with different types of receivers so we’ll pop back out oh now it says okay this one’s alive this one’s here now I’m going to use just one channel of of audio there so I’m going to go ahead and I’m going to pop into this menu and I’m going to tell it just use power from channel number one it’s a dual
Channel receiver so I can pop back out whoops and now it’s hard to see but now we just have the left receiver turned on for this unit right here and we’re just going to use one of them in a minute here but in this menu I can do other things here so I can go and do an RF scan here so we can start the scan and it’s checking to see um what frequencies are being used right now and right now this things are looking really nice and clean in our little bunker here isn’t that good news [Laughter] so we don’t have anything going on right now actually the the reality is is that’s because I don’t have the antennas attached I have uh detached the antennas um that’s the feed right here but that’s why we’re getting basically nothing um life is never this is not real life it never looks like that what you’ll typically see is you’ll see spikes where there’s some sort of radio frequency at a particular frequency in that in that whole band there so that’s one thing you can do here all right and then you can also get some additional information about each of your receivers here you can go in and change the frequency for your receiver you’ve got some other options here so again you can update the firmware for your receiver even while it’s attached here as opposed to having to pull all of this out and do that manually but just just a that’s a that’s another course as well RF so there’s that then we have our system menu system menus where you do things like set your tone setup which which channels you want to set tone to um how loud it is what frequency it is um then we’ve got a bunch of things setting your date and time doing firmware updates figuring out what version you have currently turning on the Bluetooth radio or turning it off you have this expansion port to which the SL2 slot system is attached so that’s where you turn that on or off but that’s the system menu there and then you can also use external controllers so sound devices makes the cl-16 which is a it looks a lot like a traditional mixing board but that connects directly to your 888 or your
Scorpio and I believe it’s supposed to be in a firmware update if it hasn’t already it’s also available to work with the 833 but that gives you a big nice control surface if you are working for a larger cart um that gives you just a much bigger controls a much bigger screen to work with just makes it more ergonomic if you’re going to be working hours and hours and hours at a cart so this is where you would set all of that up and then you also have quick setup here so I can save all of my global settings so if I go in and get everything set up the way I want it I can go ahead and save that and then recall it later so if something gets muddled up I can come in here and get that changed again okay let’s go ahead and show you how you would set up a particular an individual microphone so I’m going to come into channel number one here I’ve just hit that switch there and if I hadn’t already I would need to turn the trim on and you can see it’s showing how much gain we’re applying here now what I need to do is I need to choose what is a tap what I’m going to which microphone input or line input I’m going to use for these controls here for
Channel One so I’m going to go here to that input menu and I’m going to say okay I’m using input number one so I have a physical
XLR cable plugged in on the left hand side here in the sound bag to input number one and it’s a boom microphone so I need to send phantom power okay now you can see I’m starting to get levels so that’s great so I can go ahead and adjust my trim here and I’ll probably optimize my levels so that I’m peaking somewhere around -12 now if you’re doing a scripted piece minus 12 is a pretty good place to be um I mean you can these are clean preamps you don’t have to go that high but um if it’s a scripted piece and you know there’s not going to be any screaming or yelling or loud laughing or anything like that that’s a pretty safe place to be but if I was doing something unscripted I would probably gain down a little bit more and a question I get a lot is what is a little bar that sticks for a while versus the Green so the green is essentially a Vu meter that’s in essence an average level and then the little bar is the peak level so that the highest amplitude you’re getting is that little bar and that’s what you’re G that’s what I’m generally using to adjust the levels to know where
I’m at I never want that to be up against zero or hitting up against the limiter so if I if I gain up too much you can see I’m constantly up against the limiters here never want to do that so I’m going to gain back down here and that’s going to take me so that I’m peaking somewhere around -12 like that okay now in this menu we have a bunch of other options as well we have the ability to link so if I’m doing a stereo recording I can link input number one and input number two in a couple of different ways I can link them as just stereo pair and then control them from the the same trim knob or I can set them up as a mid-side pair so it’s a different type of stereo recording again really outside the scope of what we’re talking about today but that’s where I would set up a stereo pair right there next up I have the high pass filter or low cut if you prefer prefer same thing different names and here’s where I set the frequency so typically for a spoken word I almost always leave that on at about 50 hertz I don’t go higher than that typically maybe 65 um unless unless I’m doing live sound um and then I just kind of tune it by ear but that’s the low cut filter we have a phase invert here so if I have the boom microphone is and you’re getting this and you have a lot of microphones coming in at the same time and they’re sounding really kind of hollow and weird sometimes inverting the phase of one of them will help them get closer so that you’re not getting that kind of really heavy comb filtering so that’s one thing you can do there there’s also a delay so if I have a digital wireless microphone system that
I’m bringing in on the other channels and I have a wired boom mic on this channel I might want to apply a little bit of a delay here so that they will be in sync digital wireless microphone systems typically have some latency it takes them some amount of time before they arrive at the um at the mixer so in any case that’s that’s what that’s for I’m going to just rush through the rest of these settings and then we’re going to go to the questions I know we’re running a little long here so all right here’s where you turn the limiters on and off you also have a compressor that you can turn on so that’s a nice feature as well you can turn that on there here is where um let’s see here I’m having a hard time seeing just a second oh this is uh if you’re going to record the isolated Channel pre or post fader you can change that here I’ve also got an equalizer so I can apply some EQ there if I need to here’s where I turn on the auto mix or turn it off and then if I had noise assist on or or
Cedar DNX that would be available there and then finally we have our routing so this is where we send this audio and by default it’s going to go to the left and right mix which you can see there post fader that means the fader will affect what gets sent to the left and right mix that’s the default that’s how you generally want it and then it also sends it to all of the buses but it sends it at minus infinity so in essence it’s not sending the audio to the other buses it’s sending it there but you’re not getting any signals so if I wanted to actually send some of that to the to bus number one for example I would bump this back up to zero DB here if that’s that’s if that’s what I wanted to do um so just at a very high level that’s how you get the audio to the buses you need to arm your channels if you want them to be recorded you have to arm them so this is where you do that and you can make sure this is how you arm or disarm and I can actually pop back out to the main screen if I want to arm input number one I can hold down this button and press this encoder at the same time to arm it so you can see now it’s red that means that channel number one is now armed or I can disarm it here as well okay we probably better pause there let’s go back out to the chat and see what questions we have we’re starting at the very beginning I’m going to take a sip of water while we’re okay first we have a question has nothing to do with the sound devices eight series but it’s a fine question for your main Channel videos do you schedule them to post at a specific time or just upload them and go live when finished uploading I usually schedule them Christopher and there are a couple reasons for that I think there’s a follow-up question if you schedule them as always for the same time we try to do it every month every Sunday at 10 A.M
Mountain Time we’ve been pretty consistent the last several months but there have been times when I’m just running behind and we haven’t been able to hit that Target but the reason I schedule them as opposed to just upload them and let them go live as soon as they’re done uploading is it a lot of times it takes YouTube longer to process the video so if you send them live as soon as you’re done uploading people will get the like a lower quality version of them at first so it’ll play back even if they’re on a computer and they have the capability of playing back at UHD it may still be played back at 360p or whatever the I don’t remember four 400 whatever the the lower resolutions are so usually I schedule it and the another reason for the scheduling is that it allows consistency for the audience to know generally when to expect the new video so they can be looking for them as well so those are my thoughts behind that okay next question
Chris also unrelated I have two questions do you have an any updated opinions or thoughts on the W love Pro and the da35 connectors regarding regarding durability I haven’t I haven’t really used them a lot Chris I’ll be honest they’re fine but I have used them very very little just because I have so many options not because they’re bad they’re fine um just haven’t used them a lot what are your thoughts on Sony’s uwp system compared to sennheiser’s g4500 system I have not used um I’ve used the G3 system though just the 100 series uh fairly extensively in the past but I haven’t used the Sony uwp system the Sony the only kind of the
Sony seems like a really solid system the only thing that’s kind of unusual about it is that the the wiring for the law of inputs is different than every other out there so it’s a little you have to have your microphones terminated specifically for wireless for Sony wireless although That’s Not Unusual with others too I mean Sound audio limited sound devices is a is its own wiring scheme as well so you just have to be prepared to pay for the you know custom termination and I apologize I have not used the G4 and and not the 500 Series so I don’t know but my senses are both pretty solid
I mean Sennheiser Sennheiser sure um even Sony’s probably bigger in the as far as Sound audio or Wireless Systems is probably bigger in the news Gathering and TV worlds than it is in the film and
TV production worlds um but my sense is that they’re pretty good too I mean Sony doesn’t make a lot of garbage they they make some pretty good stuff so I don’t have a specific comparison between those two though um there’s a lot of conversation yeah we can skip the conversation just go to the questions if you do have a question if you would tag it with at curtisjet audio that would make it a lot easier for us to find so if you have a question you really would like us to address definitely put the at curtisjetaudio there’s a clarification on this one um do you apply filters at the front end of the sound chair chain okay uh would you prefer to high pass the sound at the mic base roll off the recorder before going to edit um usually I I if I do any sort of high cut or sorry high pass or low cut in the recording itself as I mentioned just a moment ago I’ll almost do a really very mild one one that will not be um anything that gets in the way of the post team if I am handing off to a post team so typically that’ll be like a 50 hertz maybe a 60 hertz if it’s a woman’s voice maybe a little bit higher but I don’t do anything extreme with those um I I keep it really really mild so I I do it in the and the reason I do it is if I am getting a lot of Rumble just for monitoring purposes I need to clean a little bit of that up I know there are others that have different opinions is purely opinion I believe I heard Alan
Williams who’s a professional boom operator say that he never applies a high pass filter he gives post everything um so those just two different opinions I want you to know that that’s that’s an opinion but I generally will apply a just a very mild high pass filter okay this is also has two parts okay uh the fan is probably the light by the way as if we just figured out um achiri uh oh quick question for anyone who may have an answer is there a way to play or go through all the audio on the sound devices card on the mix prese sorry SD card on the mixed Breeze and then here’s we were using the same SD card for a couple of days and the client wanted to hear takes from the previous day but I couldn’t navigate to them just wondering if it’s possible yeah I think you have to choose if you had different um if you have them set up as different projects you have to go back to the previous project so you have to go back into the I don’t have a mixed pre here but there’s in the top left screen on the main screen or top left corner on the main screen you can tap on that and that’ll get your project menu and you have to select the project for the previous day if that’s how you set it up
I don’t know obviously but that’s the first thing I check
Yanti a very good walkthrough of the 888 how can you mount a slot receiver in a bag in a good way your rack mount looks very nice but overkill for one slot unit most bags have little if we go back to the overhead here Danny most bags will have a way for you to mount them without a slot receiver in the bag itself so these batteries for example are they have little elastic bands that hold them in place and in previously before I had the SL2 system I would attach my slot my receivers in in those little elastics here so in this case we’re using a an orca bag most of the bags that I’ve seen have some way to attach a wireless receiver inside the bag like that in a secure way so that’s how I would generally approach it okay
Alex after you do the RF scan how do you assign the clean frequencies to your transmitters um well let’s go back and I can show you well there are a couple things now if you’re doing more than two channels um there’s something there’s something called intermodulation that starts occurring it actually occurs even with two channels but it’s generally not an issue intermodulation when you have two transmitters in a in a in an area close to each other which you typically will for using wireless microphones what happens is the two of them essentially combine and create another spike in the frequencies at a different frequency so that will Define where you want to put your third channel of wireless audio so there is an app I know it’s on iOS I think it’s also available for Android it’s called freak finder freq finder and what that will do is it will actually help you identify so if you say I want to put my my wireless microphones on this frequency this frequency and this frequency it will tell you where the intermodulation will occur so that you can avoid those frequencies where the intermodulation will occur we actually did a we had a sound for video session with
Michael Nguyen I think back in 2020 or 2021 uh I think it was in 2020 where he talked we he came onto the session and talked about that so if you do a search for Curtis Judd Michael Wynn w-y-n-n-e um you can you can jump into that and you’ll see exactly how we go about setting those frequencies so it’s a great question
Christopher you are indirectly addressing it but one of the big differentiation differentiators of pro recorders like the eight series is that all channels are rootable or routable and not one-to-one between input and channel yeah and so on my previous 633 which is the previous generation the smaller field mixer from sound devices input 1 was always channel one there was no way to change it on the 8 series fully routable there you can you can choose exactly what is on channel one you can choose exactly what goes to all the outputs it is wildly flexible so that’s one thing that you don’t get on the again the prosumer level recorder so yes
Christopher absolutely
Mark all those features I’m now missing and wanting on my mix pre well there’s a it’s a it’s a um pardon the Pun It’s a mixed bag that also makes it much more complicated to operate and that’s especially challenging for solo operators that’s where mix pre is a much better option in most cases so yes there are a lot of features and yes it has everything you could ever possibly need but it also makes it a lot more complex and it makes it frankly more difficult to troubleshoot when you are having a problem so um so don’t miss your mix pretty too much and in fact uh Michael Wynn is one example he uses his main recorder used to be a 688 I think he still has a 688 but the main production mixer he uses now is an Aton digital cantar X3 so a big mixer along these lines but then he also has his second bag which has a sound devices mix pre in it so depending on what he’s using he may pull out that small bag for really simple scenes whereas if he’s doing the you know the bigger scenes with lots of wires which again means wireless microphones plus a mic or maybe two boom mics or maybe three boom mics um he’s he’s uh he’s got that flexibility so don’t miss your mix pre make sure even if you ever got a mixer like this a mixed pre is still a wonderfully useful tool to have at the same time but Cherry uh quick question would you use noiseassist on the bus of the tracks or does it depend on the content um well first of all uh I think there’s a big discussion about when noise assist was is useful and when it’s not so again if it’s going to be if there’s going to be post-production I would typically not use noiseassist I would let the post team do that because they’re going to do it in a way so that it’s not non-destructive the thing is is with noise assist it’s great and the same with cedar D and X great but not perfect and so if the boom mic for example gets far enough away and you pick up the signal to noise ratio between the the person you’re trying to capture and the noise around them gets low enough then noise assist starts getting confused and it does some weird kind of cutting in and out so if you’re going to do it I would just send it to a bus on an 8 series recorder if you’re going to do it on a mix pre I would just send it to the mix if you’re not using the mix for something else so that way you’re safe you still have the unaltered audio tracks recorded independently and then you have the noise assist applied to just one of the one of the bus so I would typically send it to a bus or apply it at a bus I should say all right Chris thanks for answering I rarely see the Sony system discussed or reviewed greetings from is that
I’m not sure which flag that is but
Chris maybe it’s Jamaica yeah we don’t know we’re we’re pleading ignorance and we apologize in advance thanks Chris uh Bank Buster Productions when you apply the high pass filter does it appear in the EQ window let’s take a look um we’re going to go back into our Channel menu so Danny will cut to the overhead here and we currently have 50 hertz and I think the the high pass is actually independent of the EQ oh actually it does show yeah it does show so it goes ahead and shows it in the EQ window as well to answer your question so there you go you get three more parameters it looks like three more um control points all right cool while Danny’s looking out for the other questions let me just show you as well I have oh Danny’s got it never mind we’re going to come back and we’re running up on time here teacher of teachers I’m revealing again my newbie status but in these days of smartphones Wi-Fi everywhere does any wireless system guarantee lack of interference for a system like sound devices 8 series um well no that’s a fine question so keep in mind that Wi-Fi and all and most
Internet of Things most devices that are
Wireless communicating um are using 2.4 gigahertz now they’re they’re there are exceptions to that but then the thing about 2.4 gigahertz is that pretty much in every country in the world 2.4 gigahertz is an unregulated frequency band which is to say that almost any device is allowed to use that frequency without getting where the approval process is not super onerous and super involved um and you don’t have to have the the person that’s using the device doesn’t have to have a license to operate there anyone can turn on a 2.4 gigahertz piece of equipment everyone has it on their phones so on and so forth um that what we’re talking about here with the wireless systems with the 8 series all of that wireless operates in completely different frequencies well away from 2.4 gigahertz so um no wireless system guarantees lack of interference or or lack of dropouts but the new technologies and if you’re really interested in hearing a little bit more about it uh two or three weeks ago on our main Channel we did a video on the sound devices a20 Mini and we talked about how that provides a lot more flexibility and a lot more frequency range so that you are more likely to be able to have a nice clean frequency with which to work so um no there’s never a guarantee with anything but when you start moving up to the systems that are typically used with the sound devices 8 series you’re using
Wireless it’s operating in a different frequency altogether from Wi-Fi and and smartphones
Pete thanks so much for the Super Chat appreciate that thanks for coming by today Steve are there features on the 8 series and mix pre for protecting hearing from Sudden
High SPL transients um I mean there are limiters and you should always be responsible about how you set your headphone volume um there are limiters there’s a compressor if you need those for whatever reason for whatever you’re recording um a lot of like uh my friend Watson Wu who does a lot of sound effects recording he will typically run the sounds like a lot of even the the firearms and stuff like that he’ll run them so that they intentionally hit up against the limiters but he’s always watching his his uh headphone volume so
I don’t know if there’s any specific features um for managing your headphone volume other than your headphone volume knob but these are professional tools and I think all professionals should be in a situation where they can manage that nicely so anyway that’s I’m getting the timeout signal here so all right we covered a lot uh we have a lot more to cover obviously thank you all so much for joining us today
I hope you have an opportunity to get out and work on some of your sound projects and until then get out there make some great sound we’ll talk to you next week take care everybody [Music] [Music] [Music] [Music] foreign [Music] [Music] [Music] foreign [Music] [Music] foreign foreign [Music] foreign