
YoloCam S7 — Audio guy talks about a camera?!
· Camera gear · 11:26
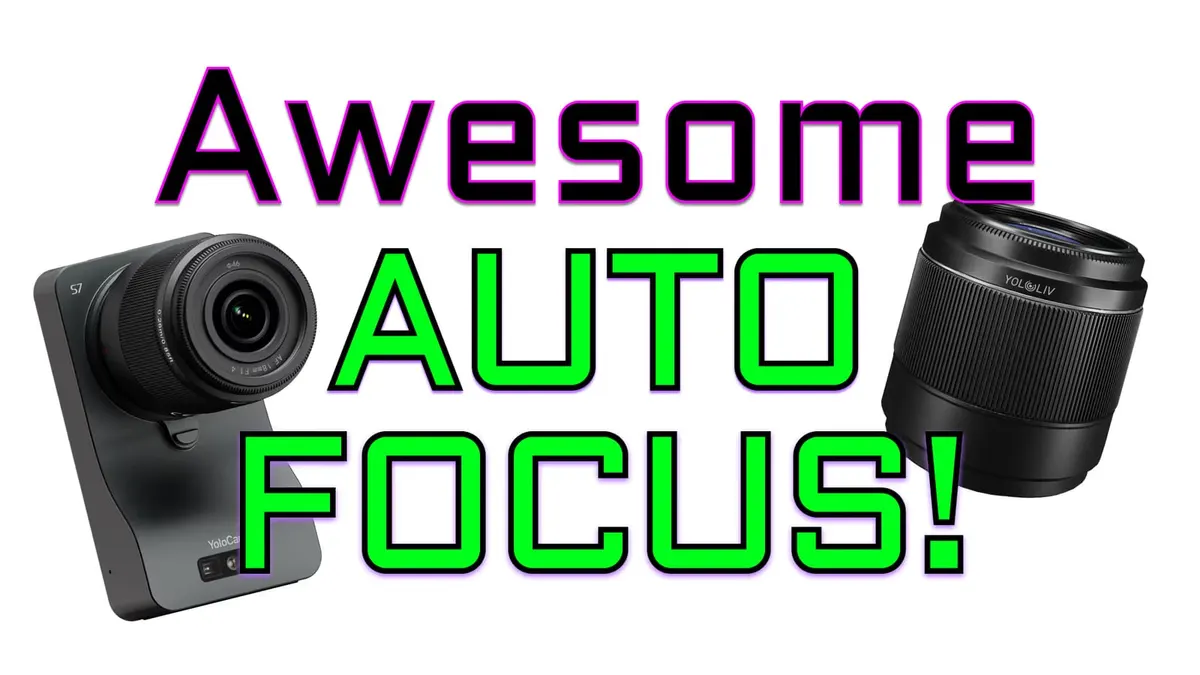
In this week’s episode, we do- gasp!- a camera review! That’s right, even audio nerds sometimes need a camera. In this case, we’re looking at the YoloCam S7 from YoloLiv. It’s an interesting blend of USB webcam and micro-4/3rds camera (yes, that means interchangeable lenses!) and we’ve had a great experience using it as an overhead cam on our weekly livestream. Let’s take a closer look and check out what special features make this such a compelling streaming camera!
Gear used or mentioned
The links below are Amazon, B&H Photo, Sweetwater, or other affiliate links. As an affiliate, I earn from qualifying purchases.
- YoloLiv YoloCam S7 — Streaming Camera with 18mm f/1.4 lens
- Matthews baby pin — to 1/4-20 adapter to mount the camera on a c-stand
Read the transcript
Curtis, you never review cameras and you’re an audio guy, stay in your lane.
Actually, audio guys need cameras, too. We have a live stream that we have every week over on our second channel, Curtis Judd Audio. And on that live stream, I usually have an overhead camera so that
I can demonstrate different products or teach how to use a particular product, whatever the case may be. So, the one thing that I’ve been struggling with on that setup is I’ve been using a really old camera for my overhead cam, a
Panasonic GH5.
Autofocus on a GH5 is not great, and I needed something that could autofocus so that I could move the products around and not have to worry about is it in focus or not, and if it’s not in focus, then having to go up and manually focus it. Kind of a pain. So, that’s what this
Yellow Cam S7 solves for me. Let me tell you a little bit about this camera. It is actually probably one of the more innovative cameras I’ve seen in the last several number of years. I don’t know how many years, 5 years at least. So, on the one hand, it’s like a mashup of an interchangeable lens micro four thirds camera and a webcam all in one, but it doesn’t have all the features of both of them. Actually, it has way more features than a webcam has and it has fewer features than an interchangeable lens camera system like a Panasonic GH7 or whatever.
So, it does have the interchangeable lenses. It has micro four thirds sensor.
What it does not have is it does not have a screen of any sort. It does not have So, you don’t have a menu on the camera itself. Instead, what you do is you have four different ports on the back that we’re interested in. Number one, a USB-C power port. Number two, a
USB-C data port, which you connect to your camera or not to your camera, to your your laptop or to your computer, and you can control it from there. You can use a settings app on your computer to change the settings on the camera. You have an HDMI output port, and you have an audio input port. So, if you wanted to bring in audio to the camera, you could do that. I don’t do that. I haven’t tested that on this camera. Uh all my audio is going to be routed through the primary camera when I’m you know, when I’m talking, that’s my primary camera. It has an XLR input, so I’ll run audio from my mixer into that primary camera.
So, what we do is we run the HDMI output from this camera into my switcher, which in my case is an ATEM Mini Extreme ISO.
So, HDMI to HDMI. That’s the use case that I’m in particular using. So, from that HDMI output, you can feed video to whatever, like a switcher like we’re doing. You can also use it as a webcam on your computer via the USB data cable. Okay, I think I’ve covered the camera. So, that’s the unique thing about this camera. It is also a mostly metal body, so it is able to be powered on for hours and hours at a time. It’s not going to have overheating issues like you might experience, especially with some of the
Sony cameras. So, that’s the cool thing about it. Here’s how I use it in particular. I set it up on a C-stand with a boom arm, and I just run an HDMI cable out to my switcher. So, you can run a longer HDMI cable. The included
USB-C cable for power is about a meter and a half or 2 m long, I think. So, that’s long enough in my case. If that’s too short, then you’ll want to take that into account. The nice thing about this power cable as well is that it does have a locking screw that you can screw down to the body so that it doesn’t pull out during the recording. It also comes with this power adapter to
USB-C to AC adapter. Now, again, this camera by default is oriented vertically. We want it to be horizontal for our particular use case. It does come with this L bracket, which essentially makes it a horizontal orientation as well. So, you can mount it on the stand like this. And what we do is we use this little quarter 20 to baby pin adapter to put it up on our C-stand, and that makes it makes it nice so I can kind of boom out and over the desk so that we can get the camera in the right spot. As we mentioned before, you cannot control the camera directly on the camera body itself. There’s no screen, no controls. Instead, you connect it to your computer via USB, and you work with this app called the YoloLiv Compose app.
What we’re going to do here is just run through some of the basic settings. So, video setting, for example, you can choose whether to put it in vertical or horizontal modes.
And you can choose the frame rate. We’re going to go ahead and choose 60 frames per second. You can flip it vertically if you have to mount the camera from the opposite side, say for example, of our desk. We could flip that, which is kind of a nice handy feature. You can also choose the output resolution of the HDMI port, whether you want it to be automatically chosen by whatever host you’re connecting it to, 4K, 1080p, or 720p.
And for clarity, 4K here is UHD.
Those are the video settings. Imaging settings, here’s where you can choose your different color profiles.
And I’m going to go ahead and leave it here on this cool colors one because we have our exposure set for this. It does a couple of other things, too. You can change the sharpness. So, sharpness is especially going to be the case on skin.
You can soften that up.
Or here’s what a grossly over-sharpened image looks like. I would say uh either at the default or lower for overhead. If you’re on someone’s face, sometimes it can help to drop some of that sharpness on their face. So, in any case, I think we’re good with the middle setting here. Contrast, I would leave this generally at default.
There’s very low contrast and very high contrast. You can make adjustments there if you’re getting you’re feeling like maybe it’s too contrasty or whatever.
And then, of course, there’s saturation. Again, I would leave that at the default here. So, we’ll leave that at 50.
Okay. You can also do what is called lens distortion correction. You’ll notice here, this is the 18 mm lens and when I click on this, you can see it corrects some sort of barrel distortion. Kind of bulges in the center here with that off.
This does a correction for that, so it’s a really nice look. And then also, if your lens has any sort of vignetting, you can use the vignette control to manage that. Vignetting is where it’s a little bit darker in the corners.
We’re not really experiencing much of that here, so that doesn’t do a lot here, but it is there if you need it.
Focus. Again, the main reason I wanted I was excited about this camera is that it can automatically focus in a really nice way. So, for example, I can show the product and it does a brilliant job of focusing on it for me without me having to fuss with anything else.
Now, a couple settings here. If you’re using more than one of the Yellow Cam
S7s, you need to choose a separate channel for each of the cameras. That’s just how they operate here.
I’m going to choose the automatic focus continuous, so it is continuously tracking and keeping that in focus for us. You can do single focus, so if you wanted to just stay in focus here, you’ll notice here now when I bring this up, it doesn’t change what it’s focused on.
It stays focused where we had it originally. You can also do face detection, which works quite nicely, although I’m not using this camera for the face, but you can also do manual focus as well.
And dial that in if you want to do that. So, we’re going to go back to auto focus continuous. You can choose the size of your focus area. You can see we have a large the yellow box here. Anything within that is where it’s looking to keep things in focus.
Then we have the focus speed. Uh let me just show you the differences. Here’s fast.
Okay. Let’s go to slow.
Slow is kind of funny.
It’s kind of like fast focus, but it just pauses for a while before it does it. Not my favorite setting, but middle seems to work pretty nicely. It relaxes the focus just a little bit so it’s not so jarring to watch. I like the middle setting for what we’re doing. You also have the focus enhancement and lens correction options in here to help with the focusing if your lens seems to need that. Zoom, you can zoom here. This is I believe it’s either cropping in on the sensor or it is a digital zoom. If it is a digital zoom, it’s doing a nice job. I don’t have any qualms about actually zooming in to about three like right there. And that’s pretty convenient. It’s nice to be able to do that so I don’t have to move my camera necessarily to get in a little bit closer.
AI parameter is a way to use AI to automatically set your exposure.
I didn’t love the results, but you can try it and see if it works well for you.
Here are the exposure settings again. Manual is awesome. Here’s the auto exposure. That actually did a little bit better this time, although it does feel like it’s a little bit underexposed. And here’s my manual exposure.
Just so you can see there.
You can control the aperture, the ISO, and the shutter speed, which is nice.
And for white balance, this is where I actually correct the colors to get them where I would like them. So, by default it came in it’s looking something like this where my skin tones were looking a little too magenta. So, what I did is I kind of tuned it in and dropped this red offset to five and that gave me a more natural look.
Which is cool that you can control that. So, of course I set the white balance to the Kelvin temperature of my light, which is 5600 Kelvin. If you’re using a light that’s daylight, you want to set it to 5600 Kelvin. And then I left the tone and the blue offset to the same. You can use the blue offset to uh notice how that’s much bluer.
That’s much less blue. Um I normally would leave that the same and then I adjusted the red offset to get where I wanted to go. Okay. I have not used the audio input on this particular camera so I don’t know what it’s like, but you do have volume.
You can choose your microphone type, whether it’s a microphone or a line input. Some wireless microphone systems you might want to choose line input if the input signal is too hot, coming in too strongly. Um, otherwise you would choose mic level. And then you can also turn on some noise reduction and add some latency if the if the audio and the video are out of sync, you might want to add a uh I don’t know. Let’s see how much you can add here. Can I add say 300 milliseconds of latency? It looks like I can.
So, that can get the audio and the video back in sync with each other. All right.
I’m not going to run through all the other settings. There are some others here, some color grading settings as well. I’m going to you can run through the tutorial if you want to see how that works. I’m going to skip that.
And then there’s also these different scenes that you can set up, which is cool. So, if you want to make a preset for different scenes that you’re doing, that’s a possibility as well. So, that’s the Yolo Live Compose app. So, that’s the Yolo Cam S7 working great for my overhead camera for my live streams. Thank you to Yolo Cam, Yolo Live.
It’s the company’s called Yolo Live for sending this over to me. Full disclosure, they gave it to me.
I’ve not paid for it. They haven’t told me what to say. They haven’t reviewed this video prior to posting.
So, I hope that was helpful for you. There’s an audio person’s perspective on an overhead camera, webcam / hybrid / interchangeable lens camera. Get out there and make some great [music] live streams. Talk to you soon.